Welcome to our series exploring quilting basics! We left off with a look at the nine patch quilt block. Next time, we’ll be exploring the shaded four patch quilt block. For an overview of the series, you can check out all of the posts here.
Hi friends!
This week in the Exploring the Basics series, Tammy and I are chatting about the disappearing 9 patch block. Have you heard about this block? Scroll down to learn more!
Basically, the disappearing 9 patch is when you make a 9 patch block, cut up the block and then sew it back together. Below I will share 6 different ways to make and cut up the block.
Disappearing 9 Patch Block Cutting Method #1
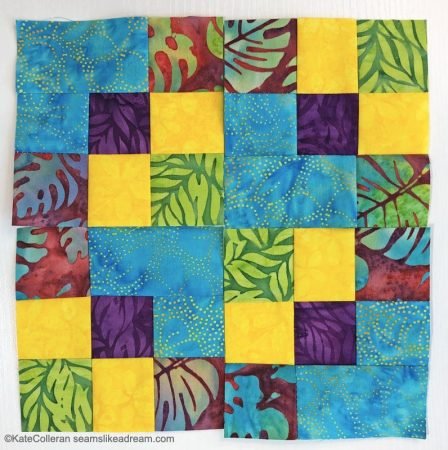
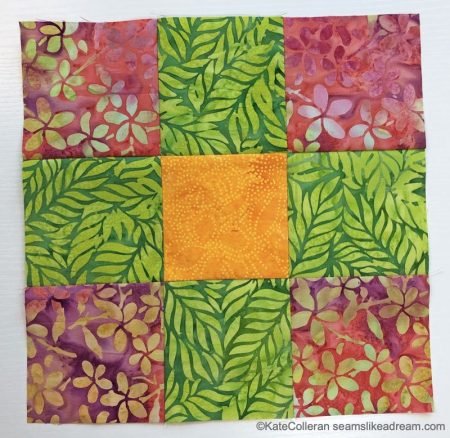
Here is my 9 patch block made with 3 ½” squares.
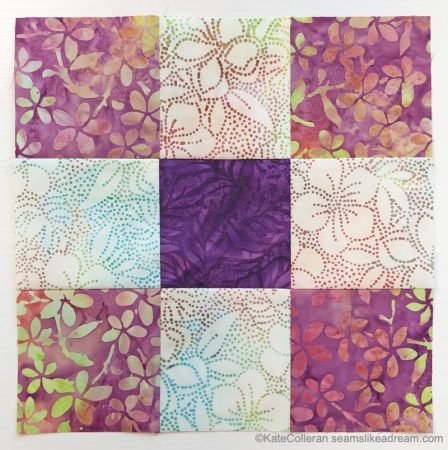
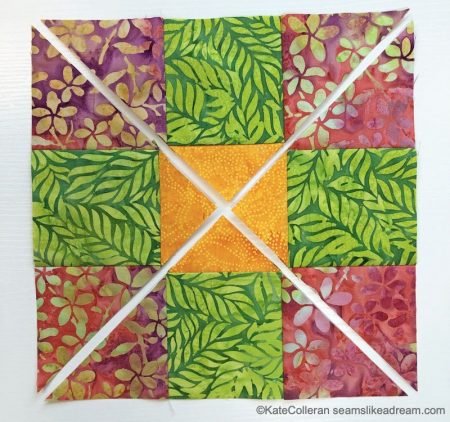
I cut the block in half from the top to the bottom and then from side to side.
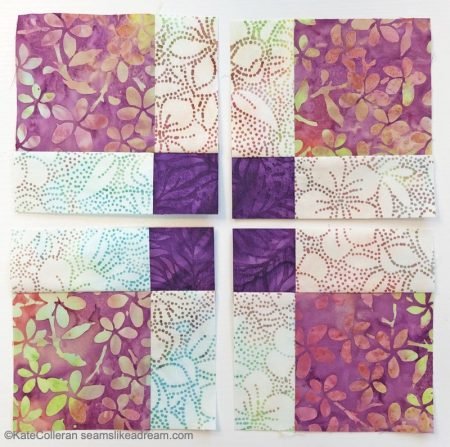
Next I turned 2 of the units and sewed the units back together.
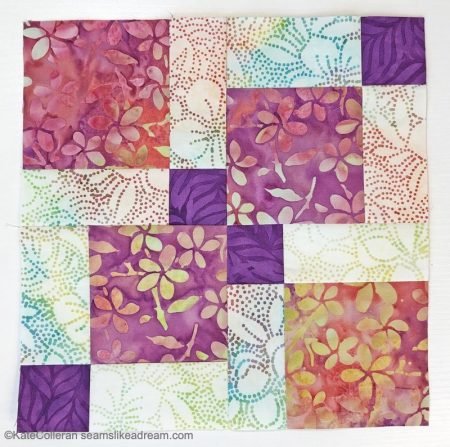
Or I could have sewed it back together this way.

The block can look really different depending on whether you make a scrappy 9 patch to start or use a consistent fabric plan.
How big will your block be after you cut it up and sew it back together?
My squares started at 3 ½” x 3 ½”. My block was 9 ½” x 9 ½”. If I sewed it into a quilt as a 9 patch, it would finish at 9″ x 9″.

My disappearing 9 patch ended up at 9” x 9”. So in a finished quilt it would be 8 ½” x 8 ½”.
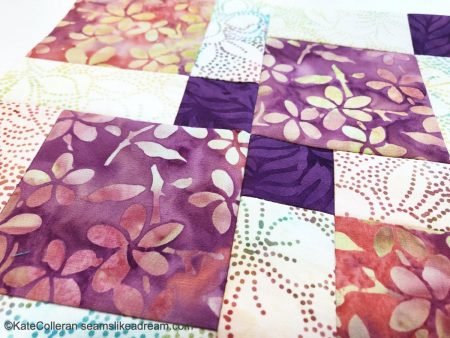
If I had started with 5″ charm squares, my 9 patch block would be 14″ x 14″ (13 ½” x 13 ½” finished in a quilt) and then disappearing 9 patch would be 13 ½” x 13 ½” (13″ x 13″ finished in a quilt).
Cutting Method #2 – Double Disappearing 9 Patch Block
For this method, you would start by making your 9 patch and then cutting as explained in method #1. But then you would need another 5 squares that are larger than your original squares. They measure the size of the units you just cut from your 9 patch.
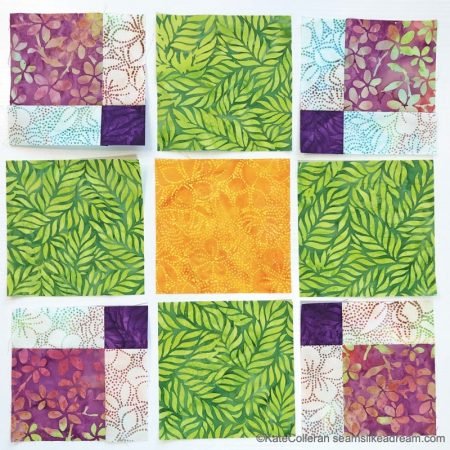
For my block, I started with 3 ½” squares and my 9 patch measured 9 ½” x 9 ½”. The squares cut from my 9 patch measured 4 ¾” x 4 ¾”. So I cut 5 additional squares 4 ¾” x 4 ¾”.
Then I sewed those squares and units into a 9 patch.

And cut it up again in the same way as before, through the center from top to bottom and through the center from side to side.
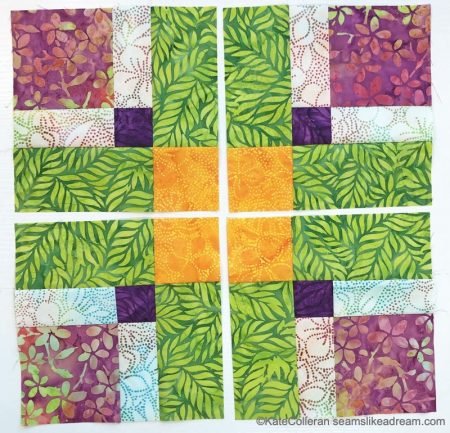
I rotated 2 of the units I and sewed the 4 units together. A double 9 patch block!

If you want to know about the math, the math for these blocks is not pretty! When I sewed my 4 ¾” squares/units together, I ended up with a block that measured 13 ¼” x 13 ¼”. So cut in half, each new unit measures 6 ⅝” x 6 ⅝“. Once my units were rotated and sewn back together, the block was 12 ¾” x 12 ¾”. When I put it into a quilt, it will finish at 12 ¼” x 12 ¼”.
Cutting Method #3 – Double Disappearing 9 Patch Block Version 2
There are other ways to cut your block. In this method you would start with two 9 patch blocks using different fabrics.

Cut strips off the sides of each block.
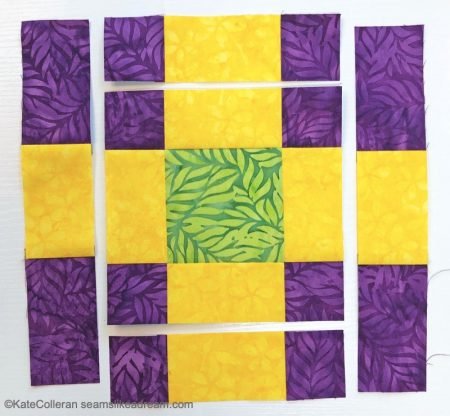
How do you know where to cut?
To determine where to cut, measure the center block and divide that number in half. So if I started with 3 ½” squares, my center block would be 3″. Half of that is 1 ½”. I would then make a cut 1 ½” from the seam lines.
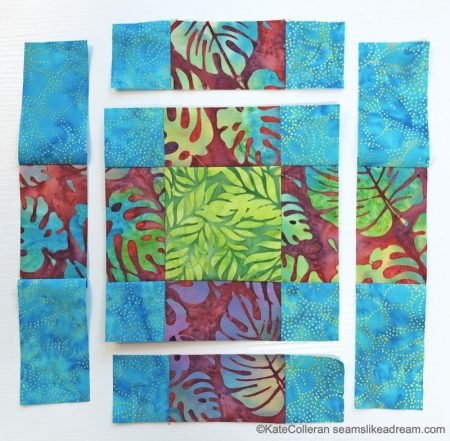
Then swap out the cuts- take the side cuts from one block and add them to the center of the other block.

The short cuts will line up but the long side cuts will end up being longer than your block. Just center them on your block and trim once they have been sewn on.
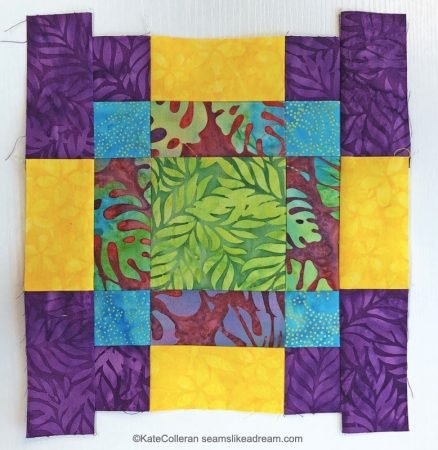
Now you have 2 double disappearing 9 patch blocks!
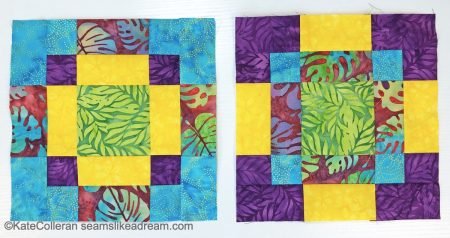
Now you can even cut this block up again!
Cut again in the same way as cutting method #1, rotate 2 sections and ta-da!
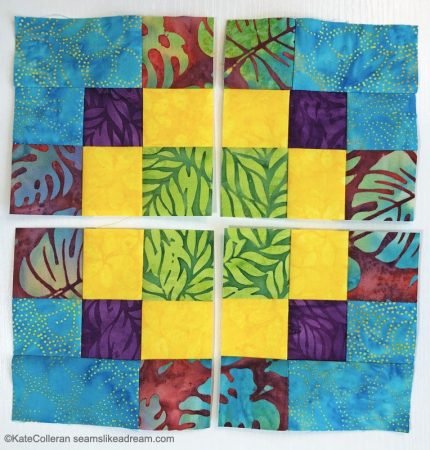
Another block variation!
Disappearing 9 Patch Block Cutting Method #4
Want to get a little crazy???
How about cutting the blocks in half like before but then making a second cut on the diagonal? My friend Becky of Patchwork Posse has a post about this method called Criss Cross.

Second cut goes like this:
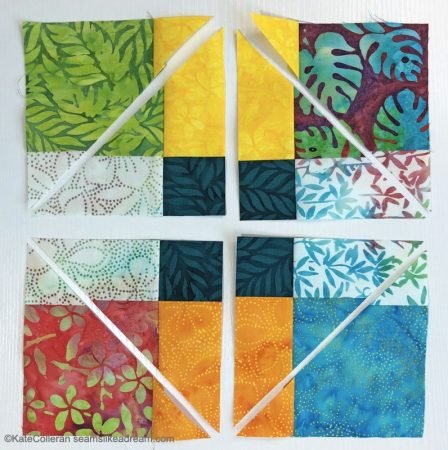
Then move the pieces arena, rotate units…. here is how my block came out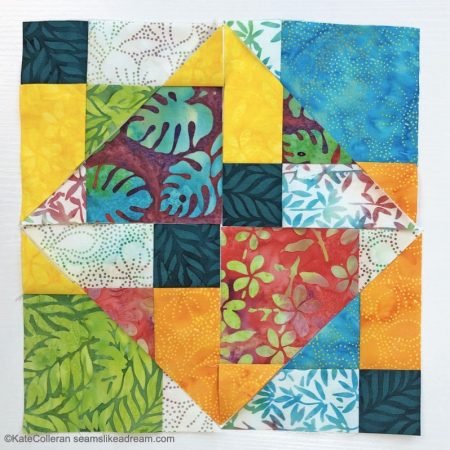 .
.
You can either mix and match with each block or just mix and match among a bunch of blocks.
Wow!
Cutting Method #5 – QST Disappearing 9 Patch
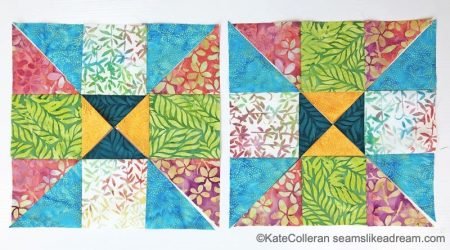
What if you made 2 different 9 patch blocks and cut them into quarter square triangles?
Block 1
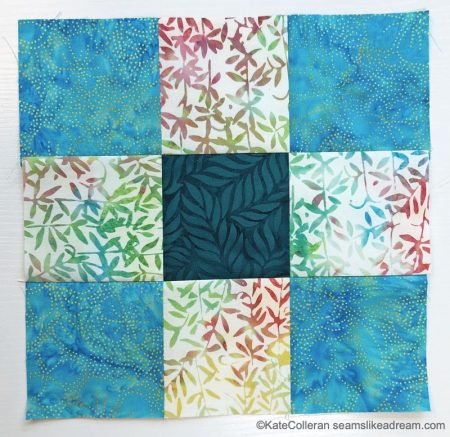
Block 2
Cut
Then you could do a swap and sew 2 of each together into a block.
Disappearing 9 Patch Block Cutting Method #6
Or maybe you want to go a little more modern. I saw this method in this blog post by ??? where she only cut vertical strips. I started with a scrappy 9 patch block.
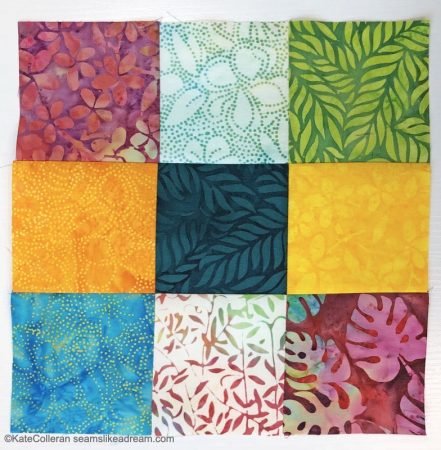
I cut my block into 3 sections, rotated one and put it on the other side of the block and just moved the other next to the block.
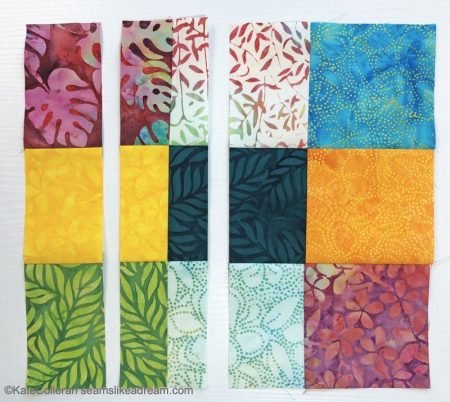
Your block will be not be square so you will have to trim it to be a square- or use it as a rectangle!
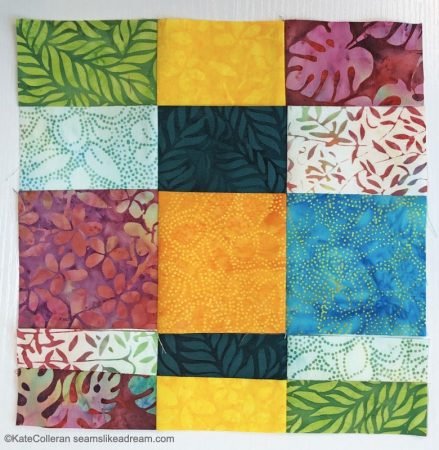
I made a cut on the long side and added it to the sort side and then trimmed to a square.
These are just a few different ways you can play around with your 9 patch blocks and make disappearing 9 patch blocks!
Have you done this? What’s your favorite way to make a disappearing 9 patch? Feel free to share in the comments!
Click here to head over to Tammy’s post and see what great ideas she has for you!
happy quilting,
Kate
Retreat from Home
Have you signed up for the Fall Retreat from Home???

The early bird pricing ends Aug 22nd (this Saturday)! I am so excited to be teaching again at the Fall into Sewing retreat along with some other amazing instructors.
Click here to go to the website to sign up!! We will have sew much fun!

I love this tutorial! I would love a book with lots of disappearing blocks explained and shown (especially if it’s spiral bound), I love all these 9 patch ones.
I’ve been discovering other disappearing blocks too. They’re just so much fun!
Absolutely amazing tutorial. I was really looking for something like this. Thank you. 😃
I am so glad you found it helpful!
Thanks for being here.
Thank you for sharing such detailed instructions. I love looking at other people’s work but now I am feeling confident enough to experiment with my own nine patch block.
Great! Have fun!
I would to purchase the instructions for a disappearing 9 patch. I
am 84 years old and I am teaching a group of other seniors new blocks.
I watch you tube , but have not found anywhere I can purchase these
instructions. Your instructions look easy to read and follow.
Please let me know how much you charge. I am interested in all the disappearing blocks.
Thank you so very much.
Zelma,
So glad you like the disappearing blocks! I have the Disappearing 4 Patch available as a PDF pattern and will work on the Disappearing 9 Patch soon. Click here for the 4 Patch pattern.
Will be looking forward to this! I need my patterns on paper to write my crazy notes as I go. I’m just no good with videos and long blog posts. Thank you,
I’d like to sign up to get info from you.
I would like to make a disappearing nine patch that finishes 2 1/2” before sewing into quilt. I don’t know what size blocks to start with. How do you figure this?
I love to work with tiny little pieces!
Loved you showing different ways to cut the disappearing nine patch— great scrap buster! Thanks
All those variations made my head spin! So much fun!
I just love to challenge myself to everything especially on quilting. I don’t know why complicated design always caught my eyes and can’t wait to try
Always have loved the disappearing patches . These are AWESOME . Thank you for sharing , And a Big thank you for the free pattern for joining .
Glenda,
You’re very welcome!
This is absolutely gorgeous. Thank you for sharing.
You’re welcome!
I think I’m in luv!!
Wow! What a wonderful treat! Already knew about a couple of these but the disappearing 9 patch varieties are great. am going to try those. Looks like such fun’ Thanks again for sharing!
New at quilting & having trouble squaring off. Can you give me some tips. My blocks seem to come out wonky. Love what you did with the disappearing 9 patch. Making a quilt now with all kinds of different blocks & I will certainly in corporate a couple of these. Thank you.
Hi Lorraine!
Squaring off blocks is easier when that pesky ¼” seam is fairly consistent – my biggest problem! I did a recent post and video about achieving that and how we can end up with bowed or distorted seams. See if any of that information helps! This one has the link to the video: http://katecollerandesigns.com/quilt-along-2021-lighthouse-steps-post-3/ and this one is just about the seam: https://bit.ly/3dlNe95. Hope that helps!