Hi friends!
Allure BOM Block 4 tips!
It’s time for tips on making block 4 of the Allure BOM quilt!
How have you been doing with the first 3 blocks?
If you are just finding this post and haven’t been following along, here is a recap!
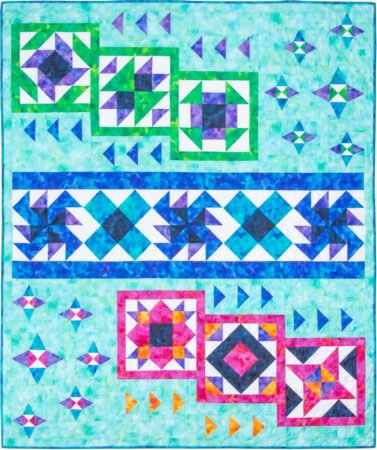
Allure is a BOM pattern that I designed for the QT fabrics to use with their line called Aura. This line of fabrics is just so lovely; it has great depth of color and movement.
I have a “quilt along” series of blog posts to go along with the pattern. No matter when you start making your quilt, you can reference these posts for tips on making your blocks! The posts will run from April 2024 – December 2024!
If you want to quilt along with me and QT, check with your local quilt shop to see if they are carrying Allure and running a BOM program. If not, you can check with this list of shops and see if they can work with you!
Piecing Options
First, let’s get this out of the way; Block 4 is a LOT! Most of the months with this quilt are easy- 1 or 2 blocks and not too hard. Block 4 is one block, made in 2 color ways and in 2 sizes! Yikes!

So at first it seems like a lot!

There are 2 main units in block 4: Quarter Square Triangles (QST) and Peaky and Spike (AKA the V-block or Triangle in a Square).
Let’s start with the QST unit!
Quarter Square Triangle Unit
There are different ways of making QST units and which method to choose depends on your preference and also how many different fabrics will be in the unit. I go over some of the methods in my Exploring the Basics post here.
For our block 4, the QST unit has only 2 fabrics in it. And the QST unit is what changes in our 2 different color ways of the block.

Isn’t that green yummy???

The pink is really lovely too!
To make the QST units, I chose the method that starts by making HST units. Just like anytime when I make HST units, I like to oversize my squares. It lets me trim the unit to size later and I find that I am more accurate that way.
Here’s the trick when using HST units to make QST units- DON’T trim them until after you make the QST units!
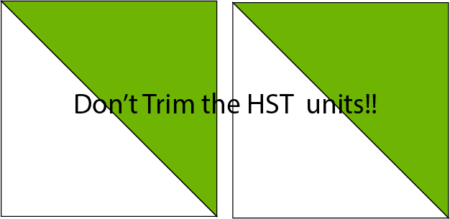
Once you make the 2 HST units, place them RST and mark them with a diagonal line and repeat the process of sewing on both sides of the line. Be sure the HST units are laid together with the green fabric of the bottom HST unit against the white fabric of the top HST unit!

And then trim to size!
Peaky and Spike
This is the unit that people can find tricky. So I have 2 options for you in the pattern. You can cut triangles OR you can paper piece. It’s really up to you.

If you have trouble sewing triangles and knowing how to line up the ends and get those important points done right, then I would suggest paper piecing.

I chose to cut triangles using the Tri Recs tool which gives you these great angled cuts that allows for easy matching up of the 2 different triangle pieces.
I go over some tips in this Exploring the Basics blog post.
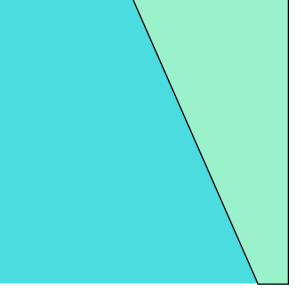
But the real trick is this, once you have your unit, it needs to NOT come to a point at the lower corner.
Sewing the Block
Once you have your units, the block is really just a nine patch!
And before you know it, you will be ta -done!!!
Have fun with Block 4 and I will see you next month for Block 5!
Happy quilting!
Kate
Please Note: All the sizes need for Block 4 are in the pattern. I am not sharing block or cutting sizes on the blog; you will need the pattern to make the quilt.
