Welcome to our series exploring the basics of quilting! Previously, we looked at half square triangles and hanging sleeves. Coming up next in our basics lineup is the partial quarter square triangle block. Or if you would like to start from the beginning and work through all the topics, you can find them all here.
Hi Friends!
This week in the Exploring the Basics series, Tammy and I are chatting about the Snowball Quilt Block.
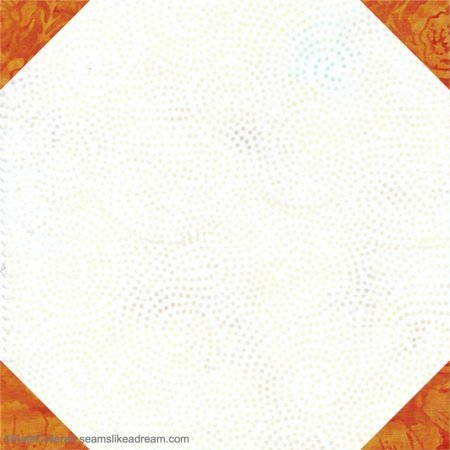
In case you are not familiar with the snowball block, here it is!
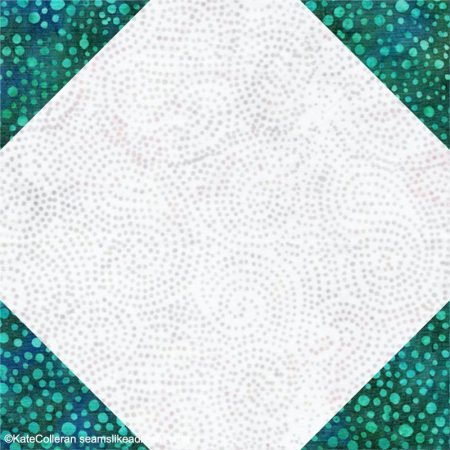 A fairly simple block but it can really work to set off other blocks in a quilt and add a new design element in your quilt.
Here is a simple nine patch star block with plain squares.

Here is the snowball block with the simple nine patch star.
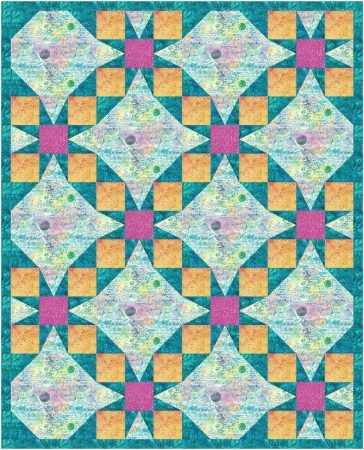
Just that simple block changes the look of the quilt and makes it so much more interesting.
Recognize that star block? I talked about in this post.
And if we make the star block more interesting, the quilt gets even better!

Dimensions of the Snowball Quilt Block
As you may have noticed, some blocks are build based on a 4 patch, some on a five patch grid and some, such as the star above and the snowball, are based on a nine patch grid.
In a nine patch grid, the block is broken up into 9 squares. First, let’s explain how a snowball block is different from a square in a square block.
In the square in a square, the side triangles meet up in the center of each side.
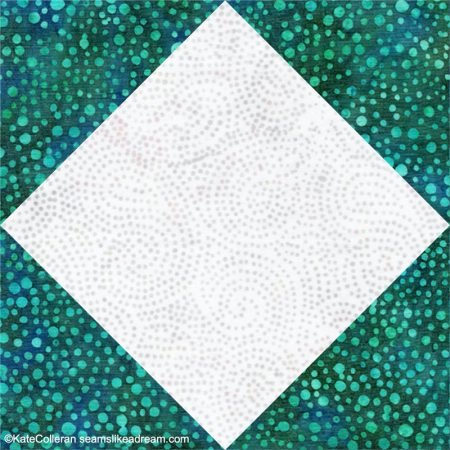
In a typical snowball block, the small triangles don’t meet up in the center.

Math
Basic math for a snowball block is the center square you cut is the finished size of the block + ½”.
The squares you need to to stitch ‘n flip in the corner of the block, for a nine patch grid, are ⅓ of the finished block size + ½”.
For a 12″ block:
Center Square – 12 ½” = 12 ½” .
Corners – 12 ➗3 = 4 + ½” = 4 ½” .
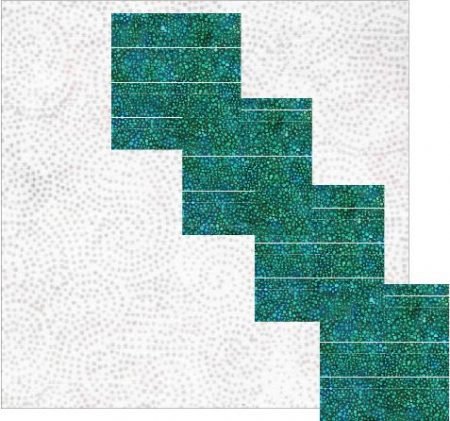
Now, does that mean you can’t make a snowball block to work with a block that is based on a 5 patch grid or another size? Sure, you can!
Depending on your design, you may want the snowball corners to line up with the last square in the grid or the second to last.
If is is the last square, your finished triangles will be small. How big would you cut the squares? Take the finished size of the block ➗ 5 + ½”.
So for a 10″ square, that would be 2 ½”.
If you wanted your snowball to line up with the second to last square in the grid, and be a larger finished triangle, the math for the squares would be finished size ➗ 5 x 2 + ½” or, for a 10″ block 4 ½”.

Let’s see how the 2 different blocks look in a quilt! Here is a 5 patch star block alternating with plain squares.

The quilt with the small triangles in the snowball block:

And the quilt with the larger triangles in the snowball block:
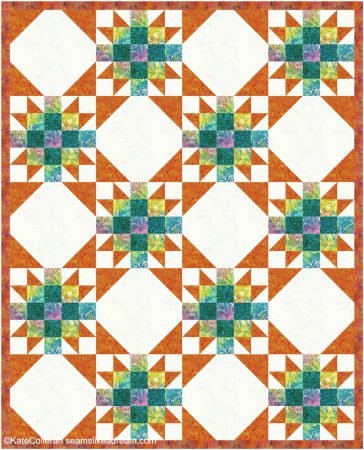
Love the different looks! Imagine all the changes we could make if we played some more with color, or other elements…
Piecing the Snowball Quilt Block
The snowball block is very easy to piece. Once you know the size of your squares, just stitch ‘n flip the small squares in the four corners of the large square.
I usually stitch in 2 opposite corners first, then do the other 2.
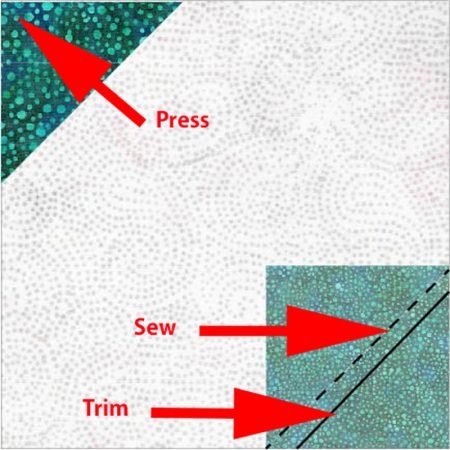
Ta-done! If you need some pointers on the stitch ‘n flip technique, click here for the post about it!

The snowball quilt block is a versatile, easy to piece unit that can add a whole new design element to your quilt!
Click here to go check out Tammy’s post and her tips!
Next week, in the A Quilter’s Alphabet series, Tammy and I are up to the letter I!
Blog Hop and Giveaways!!!!
Be sure to be back here this Friday, January 8th, for the Tiki Punch Project hop– I have some super fun giveaways! You won’t want to miss it!
happy quilting!
Kate

Love this lesson. Short and understandable. I had not thought of how useful Snowballs really were. Thanks for this one.
Susan,
I know, right? After playing with those blocks for the post, I am encouraged to create a quilt using the snowball block. We’ll see what happens!