Welcome to our series exploring the basics of quilting! Last time, we discussed the disappearing 9 patch block. Next time, we’ll be looking at the shaded 9 patch quilt block. To see all the posts in this series, click here.
Hi friends!
This week in our Exploring the Quilting Basics series, Tammy and I are chatting about the Shaded Four Patch Quilt Block. Scroll down to find out more!
The Shaded Four Patch Quilt Block
First, let me admit, when Tammy said let’s do the shaded 4 patch block, I didn’t know what it was! But I figured I could find out. And it turns out, I did know the block; it just has a gazillion names!
OK- so maybe a gazillion is an exaggeration.
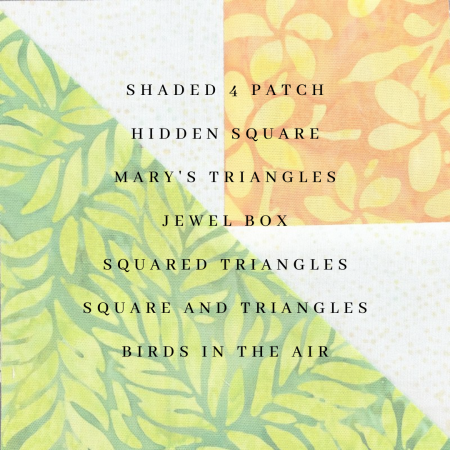
But it does have a few! Shaded 4 patch, Birds in the Air, Hidden Square, Mary’s Triangles, Jewel Box, Squared Triangles and Square and Triangles are just a few names I found.
I must admit I think Birds in the Air has more triangles in it, but … this is what I found out when I searched.
Shaded Four Patch Quilt Block #1
The traditional method for making this block is to cut 1 square for the corner square, 1 square in half on the diagonal x 1 for 2 small triangles and a larger square in half on the diagonal x 1 for the larger triangle.
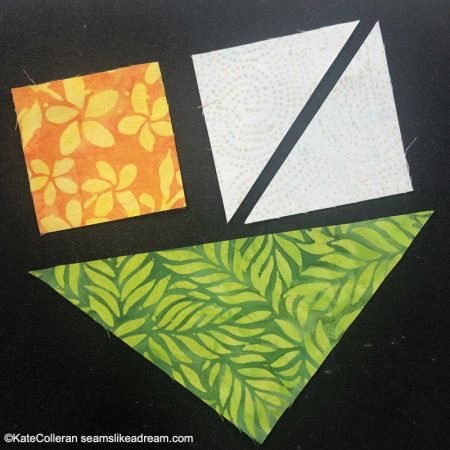
To sew the block, start by sewing one of the small triangle to the small corner square. 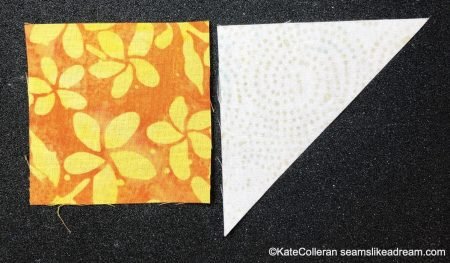
Then add the second small triangle- note the rotation of the small triangle!
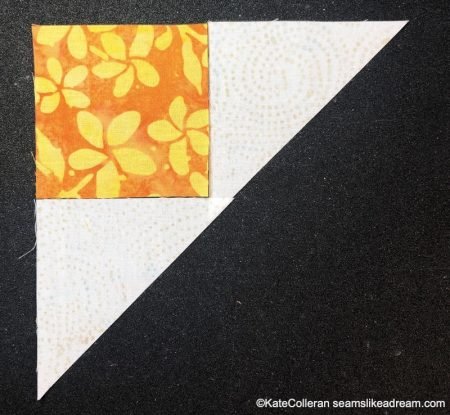
Then add the large triangle.
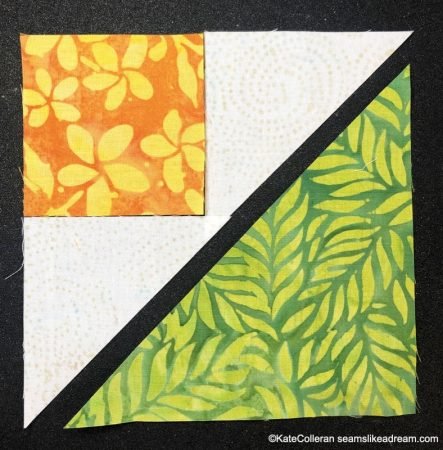
Pretty easy sewing; you just need to watch the intersections of the triangles. BUT, this method involves sewing along bias edges. Which can cause problems if you don’t handle them gently! A little spray starch can help.
Method 1- the math
To cut the pieces for method 1, start with the finished size of the block. My block was 4″.
For the small corner square, cut a square ½ the finished size of the block + ½”.
For my block, 4″ finished: corner square = 2″+ ½” = 2 ½” x 2 ½”.
For the small triangles, cut a square ½ the finished size of the block + ⅞”. then cut the square in half along the diagonal once for 2 triangles.
For my block, 4″ finished: square for small triangles = 2″ + ⅞” = 2 ⅞” x 2 ⅞”.
For the large triangle, cut a square the finished size of the block + ⅞”. Then cut the square in half along the diagonal once for 2 triangles. You will only need 1 for each block.
For my block, 4″ finished: square for large triangles = 4″ + ⅞” = 4 ⅞” x 4 ⅞”.
Shaded Four Patch Quilt Block #2
Another method makes two Shaded 4 Patch blocks at once! And no bias edges are involved!
For this method, you will either cut squares and rectangles or strips for the corner squares and the small triangles.
If you are cutting squares and rectangles, you need 2 squares for the corner square (same size as above) and 2 rectangles for the small triangles.
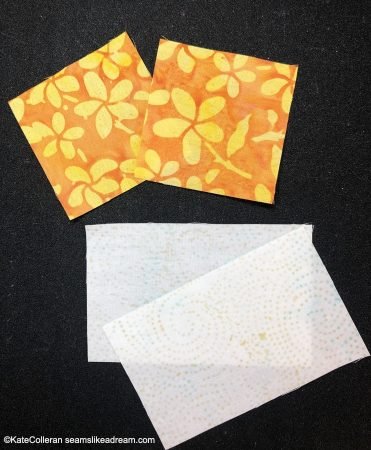
Or you need a strip of the corner square fabric and a larger strip of the small triangle fabric.
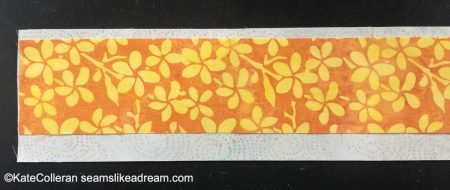
If you are making strip sets, sew the 2 strips together and sub cut into 2 units.
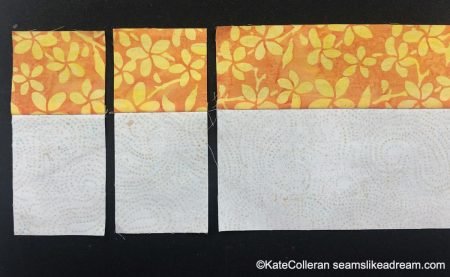
Note: units are cut the same width as the strip of the small corner square fabric .
If using the squares and rectangles, sew a square to a rectangle. You will need 2 units.
Sew the units together.
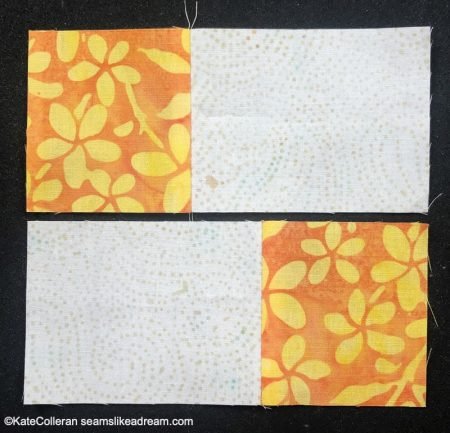
Clip the seam allowance in the center of the seam to let the seams press to the rectangle fabric. Don’t worry if you accidentally cut into the actual seam; this is part of the seam allowance that can be trimmed away!
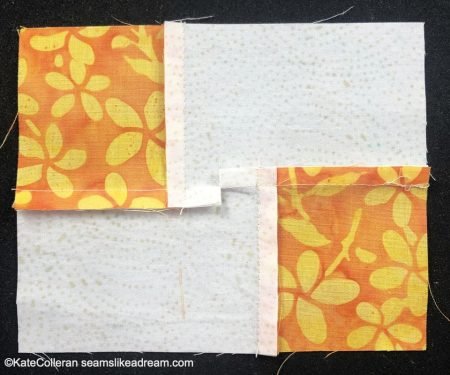
Use a triangle ruler or your ruler with a 45 degree line to draw 2 lines. The sewing lines should cross the intersection of the stitched lines as shown below.
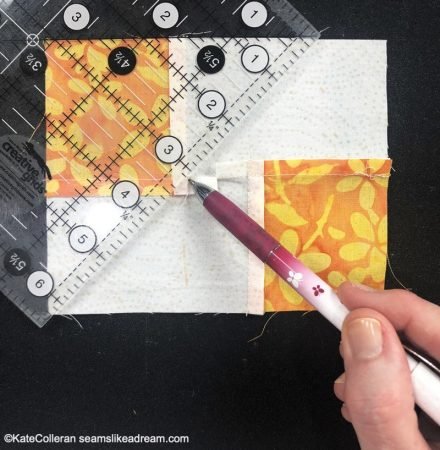
Layer the unit right sides together with a rectangle of the large triangle fabric and sew along both lines.
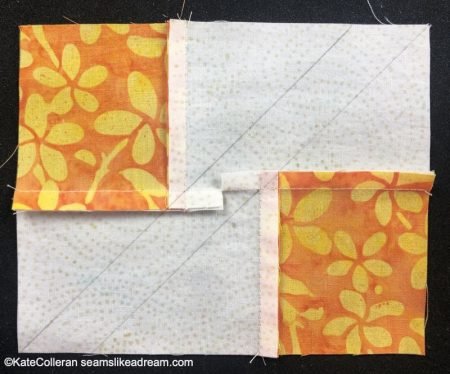
Trim thru the center between the sewing lines or trim both seams to ¼”. If you trim the seams to ¼”, you will have a little bit left over in the middle.
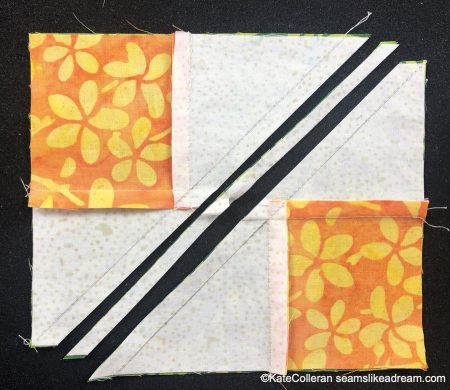
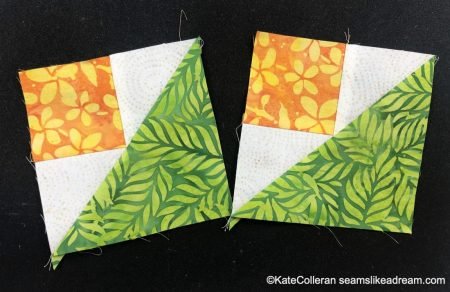
Ta-done! 2 Shaded 4 patch blocks.
Method 2- the math
To cut the pieces for method 2, start with the finished size of the block. My block was 4″.
For the small corner square, cut a square ½ the finished size of the block + ½” or a strip ½ the finished size of the block + ½” x WOF.
For my block, 4″ finished: corner square = 2″ + ½” = 2 ½” x 2 ½” or a strip 2 ½” x WOF.
For the small triangles, cut a rectangle ½ the finished size of the block + ½” wide x ½” the finished size of the block + 1 ½”. Or cut a strip ½” the finished size of the block + 1 ½” x WOF.
For my block, 4″ finished: square for small triangles = 2″ + ½” x 2″ + 1 ½” = rectangle 2 ½” x 3 ½”. Or a strip 3 ½” x WOF.
For the large triangle, cut a rectangle the finished size of the block + ½” x the finished size of the block + 1 ½”.
For my block, 4″ finished: square for large triangles = 4″ + ½” x 4″ + 1 ½” = 4 ½” x 5 ½”.
And of course, you can always oversize them and trim to size using the Tucker Trimmer or your ruler with a 45 degree line on it!
So, what do you think – does that help? Which method would you use foryour shaded four patch quilt block? Let me know in the comments!
Next, click here to go check out Tammy’s post on shaded 4 patches; I am sure she has a lot a great tips for you- especially on oversizing and trimming down!
happy quilting!
Kate
Have you signed up for my newsletter? Get a free quilt pattern when you sign up!
Where are missing pictures? Thank you . Your directions are great but I am a visual learner
Helen,
I am not sure what images you think are missing! If you have a specific question, I will be happy to answer. Thank you for visiting the blog!