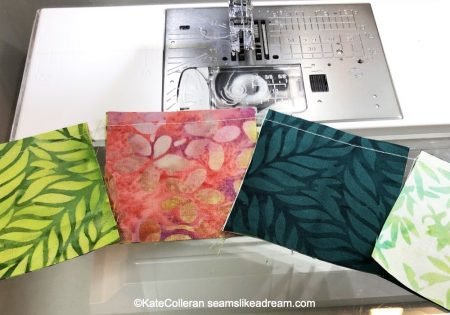
Hi friends!
Welcome back to the Lighthouse Steps Quilt Along!
Quilt Along!
In today’s post, I will be sharing some tips for sewing those rows together.
First, how did your cutting go? Are you all organized and ready to sew your rows?
Before you Sew your quilt along rows
Before you sew, there are a few things you can do to get ready.
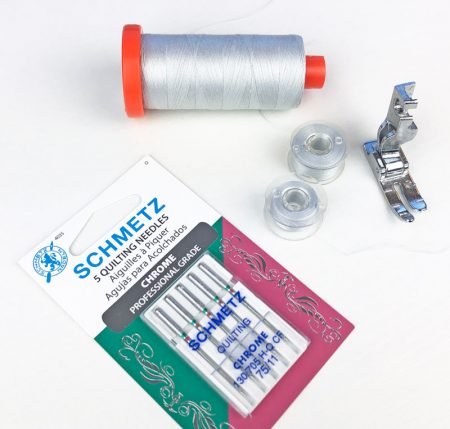
First, have you threaded your machine with a neutral thread?
Have you wound a few bobbins?
Have you put in a new needle?
Did you test your ¼” seam with your fabrics?
Hmmm…. my guess is that last one is a no. And maybe even the new needle one! (Read to the end for a fun giveaway!)
You may have a ¼” foot, or use a mark on your machine that you line up your fabric with and so you feel ready to go. Can I make one suggestion? Grab some of your leftover bits of fabric from your strips, background and/or contrast fabric.
Cut 2 squares 2 ½” x 2 ½”.
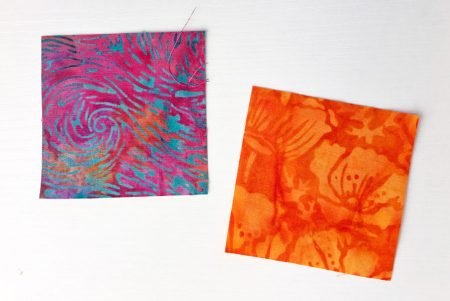
Sew them together. Press the seam to one side.
Now measure through the center of the unit. Does it measure 4 ½” across?
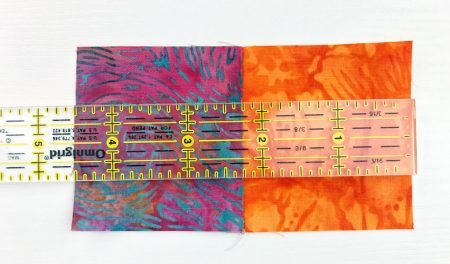
If not, you need to adjust your ¼” seam.
Notice I did not have you measure your seam allowance. Because it could be a full ¼” or a scant ¼” seam. What really matters is the size of your units when you sew them together.
Not sure what a scant ¼” seam means? It is a seam that is just a few threads smaller than a full ¼” seam. By being just a bit smaller, it leaves enough room, so when the seam allowance is pressed to one side, it adjusts for the fold of the fabric and the units will still measure the correct size. And that is why I suggest testing each time with the thread and fabric for your current project!
If your unit is larger than 4 ½”, you need to make your seam allowance a little bit bigger. If your unit is smaller than 4 ½”, you need to make your seam allowance a bit smaller.
I even have a video, made from a Facebook Live I did, on 3 tips for achieving a great ¼” seam! Click here to go to YouTube to see it.
Or for more information on the ¼” seam, check out this blog post!
Setting up Rows to Sew
Now that your machine is ready to go, let’s set up your rows. Hopefully you have them separated by section and by Row 1 and Row 2. Let’s start with the top section and the Row 1 group.
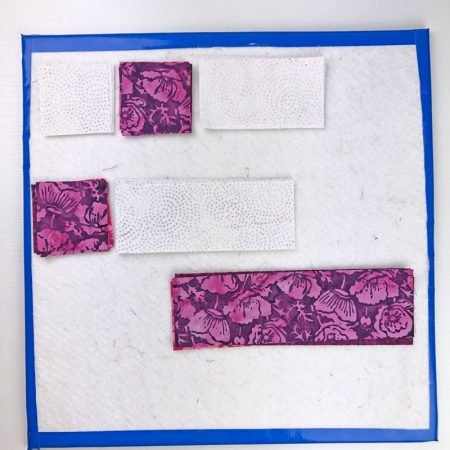
I love to use flannel design boards to lay out my pieces. Having them laid out like this makes it so easy.
I made these easy design boards using foam core, batting and duck tape! Click here for the blog post where I show how to make them!
Once I sew a section, I lay it on the board until I have all my sections sewn, then I carry the board over the ironing table to press and that way, the sections stay organized!
Note: I am making the queen quilt so my rows may look different from yours! Refer to the pattern for row layout.
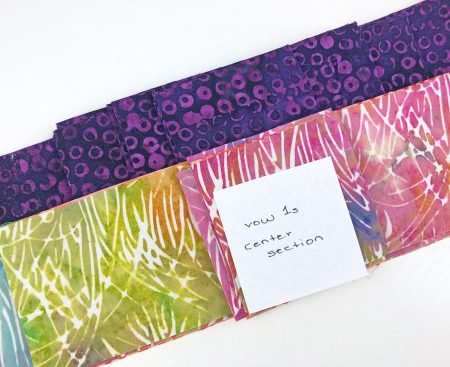
If you grab your pattern and look at the piecing diagram for Row 1, you can see how to break it down into small sections. Once you piece some smaller sections, you can create side sections of the row and a center section. The 2 sides of the row are mirror images of each other.
So, what I like to do, is piece the small sections together, then piece them into the side sections. Unless you have directional fabric, you can make both sides the same and then just rotate the second side.
Then I make the center section and sew the sides to both sides of that.
Ta-Done! Row 1 is done. Does that make sense?
If you make all of your top section Row 1 rows at the same time, you can do chain piecing.
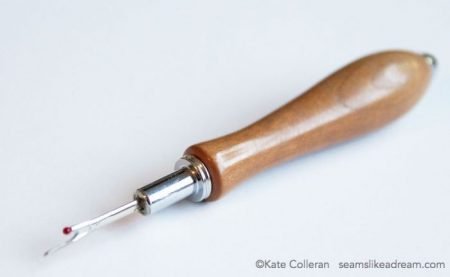
I love to chain piece and I love to sew fast- pedal to the metal, baby!– but my biggest tip for sewing things together and being able to leave Jack (the ripper!) in the drawer, is … slow down.
I will tell you, it is easy to sew your rows wrong! Ask me how I know! I will even show you a major mistake in my quilt!
Chain Piecing Tips
For those who aren’t sure what the term means, chain piecing is when you sew multiple units at once, in a continuous chain without breaking the thread between units.
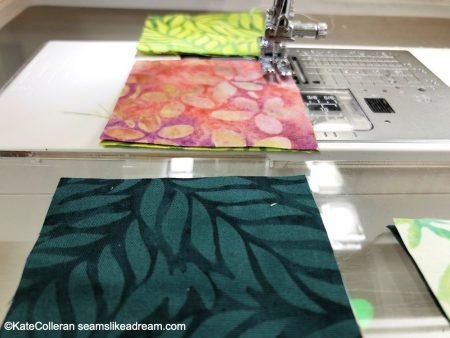
It’s a great way to piece quickly.
But you can end up with units where the things aren’t quite as straight as you might like. So here are a few tips:
- Be sure to line up the top edges of the 2 pieces you are sewing together. If they shift, you will end up with pieces that are not lined up!
- Sew all the way off the first unit BEFORE you pick up the next one! I have a tendency to let go of my pieces too soon and then they usually shift a little to the left so my seam is not even all the way down the unit.
- Line up the next unit but don’t shove it under the feet. Stop, place it down and then start sewing again. I stop my machine with the needle in the down position and my presser foot hovering slightly. I love that my presser foot hovers so I can line up the next unit under the foot! If you shove, it often makes the beginning of the seam too large so, again your seam is not even all the way down the unit.
Sewing the Rows
Once the Row 1s for the top section are pieced, I place them back into their respective plastic bags so they stay organized. Then I move onto the top section Row 2s.
But you can also make all the Row 1s for your quilt first, moving next to Row 1 for the center section and then for the lower section.
And then move onto your Row 2s. A little note: all the rows have colored strips pieces next to background pieces. So in theory, that should help keep things organized. Just note that Row 2 is especially easy to mess up!
How do I know? Look closely at this lower section of the quilt.
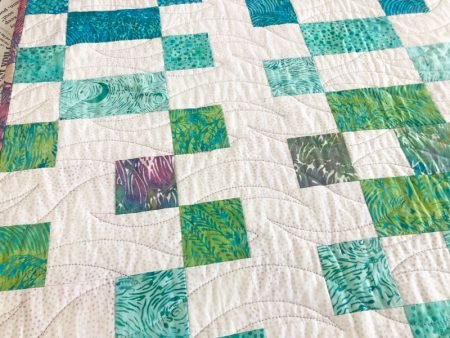
Hmmmm…. see it? Some of my Row 2s are reversed along the sides. Oops! I didn’t discover that until after the quilt went to the long arm quilter so… it stays!
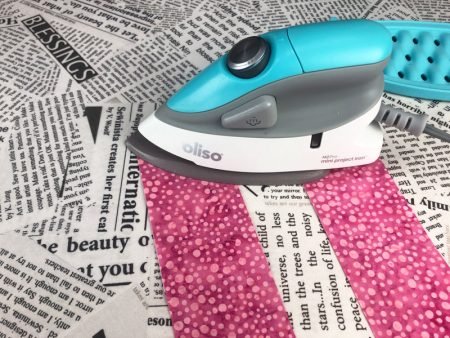
Pressing the rows for your quilt along quilt
Let’s talk pressing your rows. In the pattern, there are arrows to indicate which way I like to press.
Every time I have made this quilt, I have pressed the top section and bottom section rows to the colored strip pieces, away from the background. And that is because my background was light!

Then, in the center section, since we replace the contrast fabric for the background fabric, I like to press to the contrast fabric.
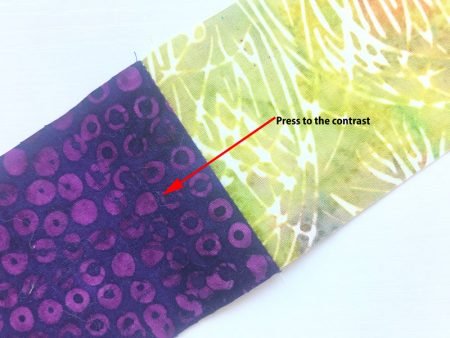
And this works because there are 2 solid rows of contrast fabric separating the center section from the other 2 sections. You don’t need to worry about matching seams between sections.
Just be consistent in how you press and then next week, sewing the rows together will be easier!
Pressing Seams Open
A quick note if you like to press your seams open. I am old school, started quilting back in the day when you had to worry about poly batting slipping through the seams! Pressing to one side was really helpful to prevent this. Another reason I usually press to the side is that seams pressed to one side are less likely to pull apart than seams pressed open. And I love nesting my seams; I just find that works for me. More about that next week.
But, if you want to press your seams open, be sure to reduce the length of your stitches. Smaller stitches will reduce the likelihood of the the seams pulling open. (Smaller stitches does make it harder to rip out mistakes but hopefully Jack will stay in the drawer!)
And when you test that ¼” seam, be sure to press the seams open so you know the seam size is good to go!
Have fun making all your rows and next week we will move onto sewing the rows together!
Quilt Along First Giveaway!
But wait…. I did mention a giveaway, didn’t I? My good friend Rhonda from Schmetz needles sent me 3 little goodie bags with new needles (I love using these quilting needles for piecing, especially with batiks!), a Pocket Guide and tag AND I will even include a little fabric goodie with each one!
Giveaway is closed! Thanks for entering!
To enter, just leave a comment on this post telling me your favorite tip for getting a good ¼” seam or your favorite size needle to sew with or… well, just leave a comment!
Giveaway is open to US residents only and ends at midnight Monday March 22nd.
happy quilting!
Kate
I like to use painter’s tape to mark a 1/4 inch line on my sewing machine.
I like to sew with Schmetz needles. I use the 80/12 for most pieceing and a #70/10 Microtek needle for batiks. Thanks for the tips from you and other quilters. I always learn something new. Thanks too for the giveaway!
I like Microtex 80/12–Nice tapered tip!
I use” Schmetz needles for all my sewing, including quilting. I’m afraid I’m still haphazard about seaming, though it’s usually “close” to 1/4″ (I’m getting better though – promise!)
Love all of your tips! I never thought about checking my 1/4 inch with each new project but I will now, thanks!
I use the ruler with the hole to find it and then mark the bed of the machine, however I think I will be checking this with your suggestion. Thank you for this post, it has some great tips and thank you for the giveaway. Have a great week.
Use the smallest needle you can. I normally have 60 wt thread so I can use a 10 needle. I don’t like the feet with the sides because you can’t see the side of the fabric. Whenever possible use all the feed dogs and move the needle over.I sew 6 1.5 in squares together and then check the length.
I use my 1/4 inch foot and use starch for smaller pieces.
I have determined that with my sewing machine I need to move the needle over a touch. The problems happen when I start it back up and forget to make the move, resulting in the first seam or two being too wide. I’ve solved that by putting a little post it on the bed of my machine when I finish up, reminding me to adjust my needle. I can’t start sewing again until I move the post it, which causes me to move my needle over. Works like a charm.
I use my presser foot to help me make a consistent 1/4 inch seam. Thanks for your helpful hints!
I love Bohin needles for hand-piecing. Thank you for the good tips.
Generally an 80/12 unless it is something like demin or a heavier fabric .and use an accurate ruler to measure units sewn together
I typically use a 75/11 needle for piecing.
I use a guide but still struggle with getting a true 1/4 inch seam! Going to try your measuring tip.
Thanks!
I use a clear little foot for 1/4” seams, but still need to pay attention ! Measure, measure, measure
I’d be lost without my quarter inch foot. I’ve tried using only a piece of tape as a guide but it doesn’t seem to provide the same accuracy. I like the suggestion above of using the quarter inch foot and extending the length of the tape. ‘m going to try that. Thanks for all the suggestions!
I like to move my needle over on spot to the right to get a scant 1/4 inch.
I use a 1/4” sewing machine foot and it works perfectly !
All my machine sewing needles are schmetz needles. I use a size 12 for piecing, size 14 for quilting and non-stick size 16 when quilting through appliqué with fusible webbing (i.e. Laura Heine quilts).
I use a letter opener as a stylet to keep small pieces of fabric straight as they go under the foot.
My Janome has a professional thread plate and foot for straight sewing only. The foot lines up a 1/4” without the little side plate which I find a little fiddly.
Thanks for the chance to win Kate!
I make a line on my sewing machine to indicate the scant 1/4″ for my machine.
I love seeing all the tips. I use a 1/4 inch foot that gives me a perfect quarter inch on my Singer
when changing feet, , and needle always test your quarter in seam.
I bought a wool mat, and it makes a big difference in the block measurements. Before, the block had “give”, so the measurements were not always accurate, but now, the seams stay flat and the measurements come out closer to true.
Thanks for the great tips! I use a 1/4″ foot which is pretty good but I also double check my seams after I’ve sewn them and make adjustments as needed.
I recycle our car’s windshield cling “thingy” that says when the next oil change is. LOL! It’s thin enough that it clings to the bed of my sewing machine, yet thick enough that it guides the edge of my fabric to make an accurate 1/4 “. I use them on ruler too if I have the same measurement for a large number of pieces. We may be behind in our current oil change….shhhhhh. Don’t tell anyone why.
I love your idea of measuring for the 4 1/2 inches AFTER sewing the seam to test for 1/4 inch seam.
I have tape that I mark a quarter in on my machine as as a guide. I make sure it is correct after sewing my first piece as the matierual you use may be thicker or thinner and you may have to adjust for that as well.
i use my 1/4 foot and usually will measure the piece after and trim. I have learned blocks go together so much better if your pieces are accurate. I usually use an 80 needle.
My go to needle is Schmetz universal 10 or 14. The color coding on the shank helps me remember which size I have in the machine if I have been away from it for awhile.
Great tutorial. Like how you explain to check the size of your seam.
I have been sewing since I was eight and am now interested in learning to quilt. Your blog seems to lay out learning to quilt, step by step. Thank you for being so detailed.
I bought a seam guide ruler and it came with a magnetic guide (off madame sew). You line up the point of the needle with the hole on the ruler. Then you place the magnet guide along the edge of the ruler. Remove the ruler and you have the magnetic guide to ensure 1/4 seam (or any seam width you want).
I have a quarter inch foot on my Bernina and have learned just where to put the fabric. Plus I always test because different weight fabrics can make a difference.
For piecing, I love an 80 needle.
I use the 1/4″ foot with the side bar. It makes the seam just a smidge too wide. So, I move the needle a hair to the right and then tape a thick piece of acrylic to my machine bed. It gives me a longer guide and keeps the foot from wobbling and my 1/4″ seams are spot on!
I always press block seams to one side – love nesting, hate pinning! Besides, if I press them open, I get more twisted seams. When I piece a border, I will press the seam open sometimes, but not often. I use Schmetz needles, usually 90/14, and Aurifil thread most of the time. My old Viking makes a perfect seam for me using the side of a regular B foot and moving the needle to 5.0. It might be one reason I’m still using that machine after 25 years. LOL Thanks for the chance to win the little goodie bag. I’m following along with what you are doing, and think there will be some beautiful quilts out of this pattern/QAL.
1/4 in foot plus diagonal seam tape to keep longer strips aligned
Love your batik fabric line!
I use blue masking tape to mark my machine front to back to help with 1/4” seam.
For me, using a 1/4” foot is a must! When I gots my first one over 20 years ago, my quilting accuracy improved greatly. I use a size 70 microtex, or a size 75 quilting needle for piecing, and a size 75 or 90 embroidery needle for quilting. Thanks for the giveaway!
I really liked your suggestions for a perfect 1/4″ seam. Thanks for this post! I have a ruler with a hole in it to use to get the needle in the exact place (I hope).
Guilty as charged. I set up for a scant 1/4″ seam but I fail to do the check. Thank you for the hints. Also, I use a Microtex needles. Usually 70 of 80.
Thanks for the tips. I really should test my quarter inch seams like you show. I always measure the seam allowance itself. I need to learn to be more precise. Thanks for the opportunity to win!
I use a 1/4 inch foot plus a ruler guide below it. Feeding the fabric in along the edges of the ruler and the foot help.
Once I have found the “sweet” spot for my 1/4″ accuracy I adhere a buffer (credit card type) perpendicular to that mark, then it reassures me I am staying where I want to be and it also reminds me to keep my fabric flowing along the edge all the way to the end of my seam. Thanks for the give-away. Keep up the good work, Kathy in Co
I use the ruler that goes under the needle to find exact 1/4 inch then I use tape to mark it off.
I usually prefer to press my seams open, but never thought about the possible consequences. I have been using a 2.4 or 2.6 stitch length. Should I go smaller?
I use my Little Foot 1/2 pressure foot and it’s accurate all the time!
When I made my first quilt 12 years ago, I just lined my fabric up with the presser
foot; and Ithen wondered why my rows didn’t line up! This is a great tip that I have since learned. I should change my needle more often–a great reminder!
My quarter inch foot and frequent checking.
I use a 1/4 inch foot and try to slow down.
A quarter inch foot and aurifil thread and test!
Lots of practice and ripping!
To achieve the perfect 1/4″ seam I use a standard presser foot and move my needle position to the right. I always make a test block to make sure I have the perfect 1/4″ seam.
I have a clear appliqué foot that I use to get a perfect quarter inch seam…I move my needle position to the right of center until the clear edge is right at the quarter inch position. Being able to see the fabric at the edge of the clear foot has helped my sewing exactness!
I have a new machine and my quarter inch seams are so much better. In fact my 3 strip test was spot on. I also like the new quarter inch foot. I’m still trying to figure out which needle my machine likes best. It’s been challenging. I recently purchased some quilting needles. I will be testing them in the next week as I will be quilting my grandsons quilt.
A good press helps to achieve my good 1/4” seam.
I’m a newbie to quilting so I am going to keep this post to refer back to it. Thank you.
I have a 1/4 inch foot, plus I test by sewing two or three pieces of fabric together at the beginning of each project.
Love the batiks!!
Believe it or not but I have spent some time this week working on a 1/4” seam. Not sure I have it completely right yet so I ordered a 1/4” foot for my sewing machine. Hopefully it gets here today – I’m excited to start sewing!
I usually piece with a size 12 quilting needle.
I often use a Microtex 75/11 or 80/12…& try to remember even good needles don’t last forever!
Never to old to learn new tricks.
I quilt with a sz 12 Schmitz needle. Which are my favorite brand of needles. I use a clear foot with tape to mark a line. I am going to try out the 1/4 ” foot though.