Skip to content
  • Shop
  • About
  • Portfolio
    • Quilt Patterns
    • Fabric Design
    • Surface Pattern Design
  • Learn
    • Classes
    • Lectures
    • On-Line Classes
    • Tips and Tutorials
    • Quilt Along
  • Blog
  • Contact
  • Shop
  • About
  • Portfolio
    • Quilt Patterns
    • Fabric Design
    • Surface Pattern Design
  • Kate Colleran Designs
  • Learn
    • Classes
    • Lectures
    • On-Line Classes
    • Tips and Tutorials
    • Quilt Along
  • Blog
  • Contact
Blog Hops and Quilt Alongs

Allure BOM QAL- Block 1 tips!

May 8, 2024July 29, 2024 Post a comment

Hi friends!! Welcome to block 1 of the Allure Block of the Month quilt along! Today I will share tips for Block 1.
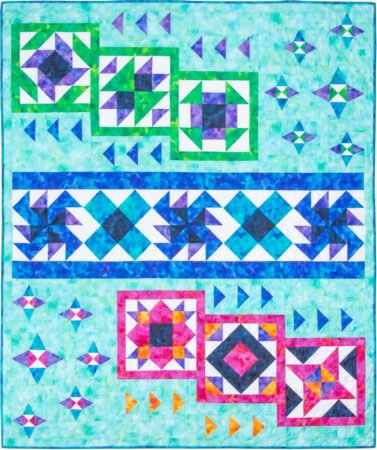
Top US quilting blog and shop, Kate Colleran Designs, shares about her Allure BOM quilt and tips for block 1! Image is a quilt with blocks set in rows with an aqua background and blocks in blues, greens, purples, magenta, orange and white fabrics.

Block 1

Block 1 is a fairly simple block to make; just squares of fabric set on point. I love the blues in this block- so rich!

Top US quilting blog and shop, Kate Colleran Designs, shares about her Allure BOM quilt and tips for block 1! Image is of an on point quilt block of squares and triangles in blue and white fabrics.

And just note, you will be making 2 of Block 1!

Now for our Allure Block 1 tips!

Setting Triangles – cutting

To put the squares on point, you needs to cutting setting triangles. There are 2 different triangles we need to cut – the corner triangles and the side triangles.

They are not only different sizes but they are cut differently too.

The corner triangles come from squares that were cut in half on the diagonal once. Each square yields 2 half square triangles (AKA corner triangles). 

Top US quilting blog and shop, Kate Colleran Designs, shares about her Allure BOM quilt and tips for block 1!

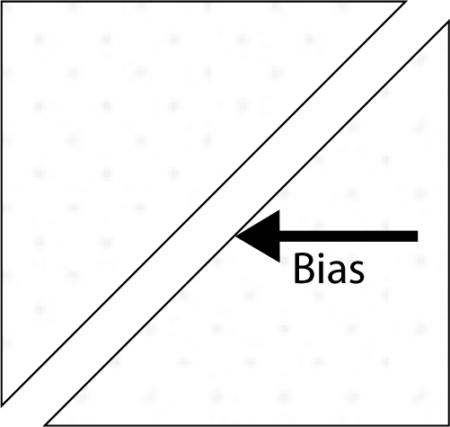
Need a tip on how to accurately cut in half on the diagonal? Click here to read my blog post on that!  

We cut these in half on the diagonal so that the outer corners of the block are on the straight of grain of the fabric. Helps keep the block from being pressed out of shape. The diagonal line is on the bias and that is easy to stretch out of shape.

The side triangles are cut differently; the come from a square cut in half on the diagonal twice which yields 4 quarter square triangles (AKA side triangles) from 1 square.

Top US quilting blog and shop, Kate Colleran Designs, shares about her Allure BOM quilt and tips for block 1!

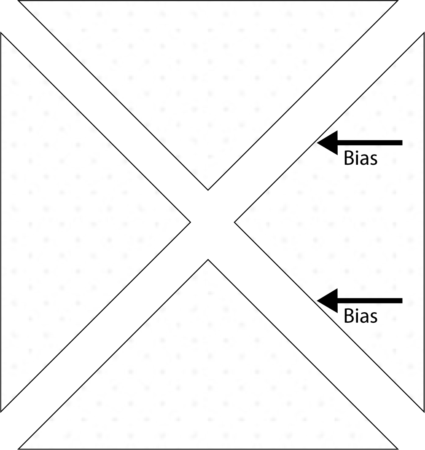
Why do we cut these twice into quarter square triangles? 

Because this gives us the straight of grain on the outside edge of the block. The bias edge, the stretchy one, is inside so our block lays better and we are less likely to press it out of shape.

Setting Triangles – the math

There is basic math on how to find the size of your setting triangles. This math works if you are putting blocks together on the diagonal or using squares to make a block.

For the corner triangles, the math is: 

Block size (finished) ➗1.414 = X + ⅞” = Y. Round up to the next ⅛”.

So for example, if your finished block is 8″, the corner triangle is 8 ➗1.414 =5.658 + .875 = 6.532. Round up to the next ⅛” so your corner triangle is 6 ⅝”. 

Now, for the side triangles, the math is slightly different.

Block size (finished) x 1.414 = X + 1 ¼” = Y. Round up to the next ⅛”.

For our 8″ block, the side triangle is 8″ x 1.414 = 11.312 + 1.25 = 12.562. Round up to the next ⅛” so your side triangle is 12 ⅝”.

Is your head spinning? A calculator really helps with this math!!

Adding the setting triangles

When adding the side setting triangles, you will be lining up the short straight edge of the triangle to the side of a block. The point of the triangle will hang off one edge.

Top US quilting blog and shop, Kate Colleran Designs, shares about her Allure BOM quilt and tips for block 1!

When adding the corner triangles, center the triangle on the side of the block. The points of the triangle will hang off both sides.

Top US quilting blog and shop, Kate Colleran Designs, shares about her Allure BOM quilt and tips for block 1!

Block 1 – last tip!

Now that you know the reason behind the triangle cuts and sizes, one last tip to make the block. You can always add even just a little more wiggle room to your setting triangles!

For example, if I need to cut them at 6 ⅝” and 12 ⅝” for out 8″ finished block, I will usually cut them a tad bigger, at 6 ¾” and 12 ¾”. Then after I have sewn them to the block (or to the quilt), I trim the block (or quilt) to size. This way if I am a little off, with either my cutting of the triangles or the sewing, I have wiggle room!

Top US quilting blog and shop, Kate Colleran Designs, shares about her Allure BOM quilt and tips for block 1!

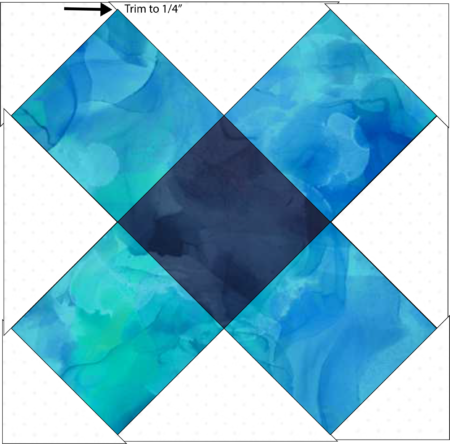
I am a big fan of wiggle room!

I hope this post with Allure Block 1 tips was helpful!

Happy quilting and I will see you next month for Block 2!

Kate

Please Note: All the sizes need for Block 1 are in the pattern. I am not sharing block or cutting sizes on the blog; you will need the pattern to make the quilt. Need the pattern? If your local does not carry it, you can Click Here!

AllureAllure block of the Month quiltAllure BOMblock of the month quiltnew quilt patternQT Fabrics
About Kate

About Kate

Hi! I'm Kate Colleran, a designer who creates quilt patterns, fabric and surface designs. I lecture and teach about quilting. Welcome to my online home!

Related Posts

Allure BOM Tips for Block 9 and Setting
Misty Mornings – a new batik line and FQ giveaway!
Allure Block 8 Tips
Allure Block 8 Tips
Allure BOM Block 7 Tips and Favorite Tools

Post navigation

April Quilt Block Reveal
May Quilt Block Remix Challenge – The Flag Block!

Leave a Reply Cancel reply

Your email address will not be published. Required fields are marked *

Dreaming In Color

Dreaming In Color

Hi, and welcome to my blog, Dreaming In Color.

There are posts with tips on making quilts, tutorials and information on my newest patterns and designs. Enjoy!

~Kate

Categories

  • A Quilter's Alphabet (22)
  • Block of the Month (27)
  • Blog Hops and Quilt Alongs (263)
  • Exploring Quilting Basics (83)
  • Fabric and Surface Pattern Design (9)
  • Holiday Quilts (32)
  • Quilt Community (176)
  • Quilt Patterns (218)
    • Bags & Small Quilts (71)
    • Braid Projects (20)
    • Braid Quilts (10)
    • Fat Quarter Patterns (21)
    • Jelly Roll Quilt Patterns (5)
    • Precut Quilt Patterns (21)
  • Quilt Projects (77)
  • Quilt Studio Tips (35)
  • Quilt Tutorials (24)
  • Quilting & Sewing Gift Ideas (8)
  • Quilting Essentials (4)
  • Quilting Giveaways (183)
  • Quilting Tips & Tutorials (38)
  • Quilting Tools & Books (72)
  • Reviews (3)
  • Series (7)
  • Testimonials (3)
  • Uncategorized (9)

Search Posts

Sign up for my newsletter and receive a free quilt pattern!

Sign up for my newsletter, Behind the Seams, to keep up to date with news, promotions, giveaways and more!

Enter your email below to get started and get your free quilt pattern!

Thank you!

You have successfully joined our subscriber list.

.

Recent Posts

  • Patchwork Braids – adding squares to a braid
  • Patchwork Braids – Braids with varying strip sizes!
  • Patchwork Braids – Bluebell placemat
  • Just Dandy- a new batik line and a fabric giveaway!

Shop ElectricQuilt.com

Check out Craftsy's Free Classes!

Archives

  • Quick Links
  • Wholesale Shop
  • Pattern Updates
  • Privacy Policy
  • Store Policies
  • Contact
Copyright © 2025 | All Rights Reserved | Kate Colleran Designs LLC