 Hi friends!
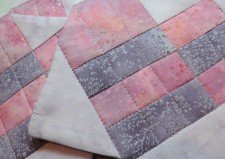
As promised, here is the tutorial for a cute heart runner you can whip up this weekend and have on the table for Valentine’s Day.
To get started, you need either 3 or 4 fabrics for the front. The fourth would be a different fabric for the border and binding if you wanted. I used 3 fabrics, repeating one of my fabrics from the block for the border and binding, but I separated it out in the directions in case you decide to use something different. You could even make the heart scrappy- that would be super cute.
Pieces of my Heart- 14″ x 50″.
Fabric A– pink -for the heart block- 3/8 yard.
Cut 2 strips 2 ⅝” x WOF- cut into 4 rectangles 2 ⅝” x 6 ⅞” and 8 rectangles 2 ⅝” x 4 ¾” .
Cut 1 strip 4 ¾” x WOF- cut into 4 rectangles 4 ¾” x 6 ⅞”.
Fabric B– purple -for the heart block- 1/4 yard or if you want a little wiggle room, get 3/8 yard.
Cut 3 strips 2 5/8″ x WOF- cut into 8 rectangles 2 ⅝” x 6 ⅞”and 4 rectangles 2 ⅝” x 4 ¾”.
Fabric C– white for background of the heart block- 3/8 yard.
Cut 1 strip 7 ¼” x WOF – cut into 1 square 7 ¼” x 7 ¼”- sub cut the square on the diagonal x 2 for 4 triangles. Cut rest of strip into 4 squares 6 ⅞”x 6 ⅞”. Sub cut each 6 ⅞” square in half on the diagonal x 1 for 8 triangles.
Cut 1 strips 3 ⅞” x WOF- cut into 4 squares 3 ⅞” x 3 ⅞”. Sub cut each 3 ⅞” square in half on the diagonal x 1 for 8 triangles.
Fabric D– border and binding- 3/8 yard or if you want a little wiggle room, get a 1/2 yard.
Cut 4 strips 1 ½” x WOF- piece strips together and cut into 2 side borders 1 ½” x 12 ½” and 2 borders for the top and bottom of runner 1 ½” x 50 ½”.
Cut 4 strips 1 ½” x WOF- piece together for single fold binding**.
** For small projects, I like single fold binding. If you want, you can make double fold. Your choice.
Backing and batting– 7/8 yard.
Cut backing into 2 pieces 20″ x 29″- piece together for a backing about 20″ x 57″. We always make our backing about 3-4″ bigger on all sides. Adjust as you like.
Okay, the cutting part is done. Ready to make a runner?
Step 1
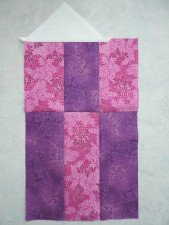
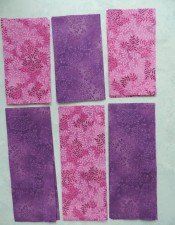 Sew 2 short Fabric A pieces and 1 short Fabric B piece together as shown. Press to the darker fabric.
Sew 1 long Fabric A piece and 2 long Fabric B pieces together as shown. Press to the darker fabric.

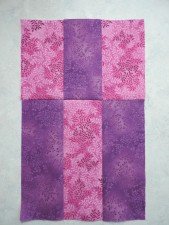
Step 2
Sew the units from Step 1 together. Press to the longer unit.
Step 3
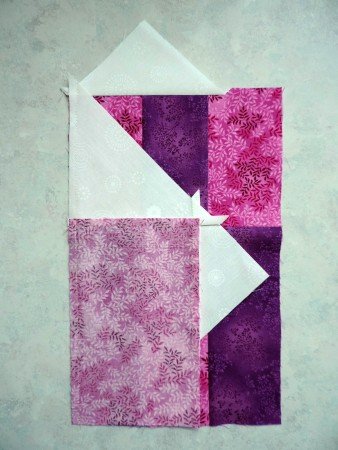
Sew a 3 ⅞” Fabric C triangle to the top edge of the section from Step 2. Line up the point of the triangle with the seam allowance as shown. The triangle is NOT as long as the top edge.
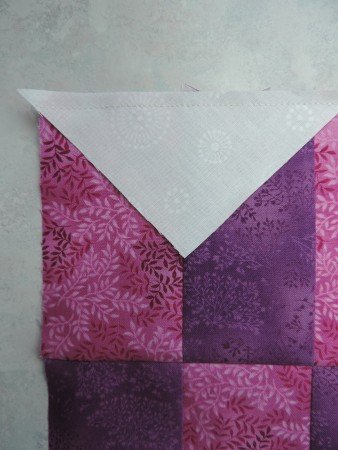
Press to triangle.
Step 4
Sew a 7 ¼” Fabric C triangle to the short edge of the 4 ¾” x 6 ⅞” Fabric A rectangle as shown.
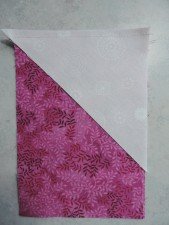
Press to the triangle.
Step 5
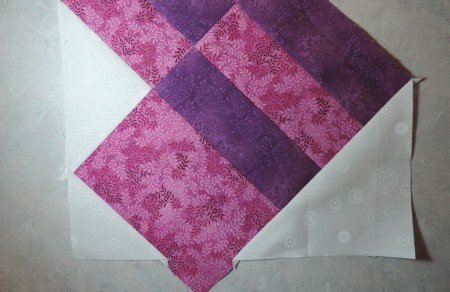
Sew a 3 ⅞” Fabric C triangle to the left edge of the unit from Step 4. Line up the triangle carefully.
The triangle is NOT as long as the edge of the unit.
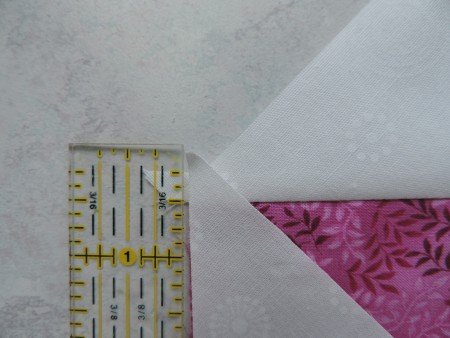
If you hit your ¼” mark correctly, the seam will look sort of like the one below.
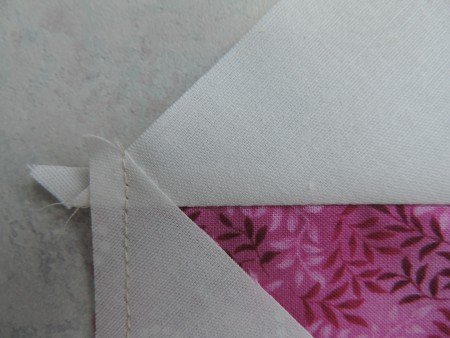
Press the seam to the triangle.

Step 6
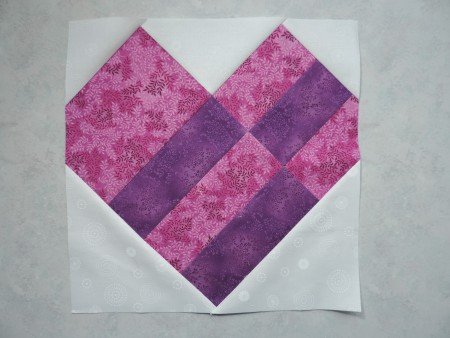
Sew the section from Step 5 to the section from Step 3.
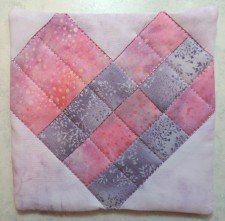
Press to one side. Almost done- you can see the heart!
(Sorry the photo is so dark- it was getting dark outside!)

Step 7
Sew a 6 ⅞” Fabric C triangle to each lower edge of the heart.
Starting with the left edge, line up the point of the triangle with the center seam as shown.

Press to the triangle.
For the right lower edge of the heart, find the center of the long side of the Fabric C triangle and then line up the triangle as shown.
The center should be 4 ¼” up from the seam allowance you just sewed.

The triangle is NOT as long as the edge of the heart.

Press to the triangle.

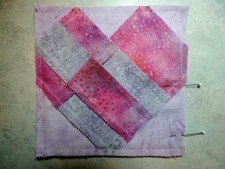
Your block looks a little weird. Let’s fix that.
Step 8
Trim your block to 12 ½” square. There, that’s better.
Make 4 Blocks. Sew the 4 blocks in a row rotating the blocks any way you want!

Step 9
Sew a 1 ½” x 12 ½” Fabric D border to each side of the runner. Press to border. Sew a 1 ½” x 50 ½” Fabric D border to the top and bottom of the runner. Your runner should measure 12 ½” x 50 ½”.

Baste, quilt as desired and bind. Done!
If you want your runner a little skinnier, leave off the border and just bind. If you want your runner wider, add a bigger border or add 2 borders! Make it whatever size you need.
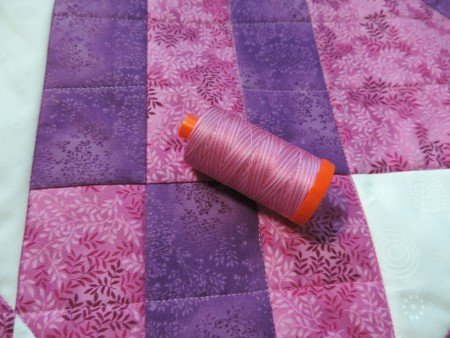
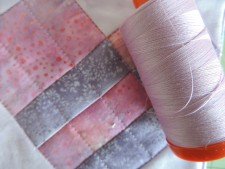
Did you notice the cute coasters at the beginning of the tutorial? I made them the same way- making little 5″ squares instead of big 12″ squares. I laid the squares right sides together with a backing square and laid them both on top of a square of batting. Then I sewed all the way around the edges leaving an opening for turning.
I clipped the corners, turned them right sides out, poked out the corners, whip stitched the little opening closed and quilted with my favorite Aurifil thread. So cute!
So how was that? Fun, right? And really, not too hard.
If you make a runner, send us a picture. We would love to see your beautiful hearts!
happy quilting,
Kate
 p.s. don’t forget to pop over to this post to enter our magazine giveaway- ends tonight- Friday Feb 6th!
p.p.s. For those of you who want to make little coasters, here are the cutting directions- for 4 coasters.
Fabric A– pink
Cut 1 strip 2 ¼” strip x WOF- cut into 4 rectangles 2 ¼” x 3 ⅛” and 8 rectangles 1 ⅜” x 2 ¼”.
Cut 1 strip 1 ⅜” x WOF- cut into 4 rectangles 1 ⅜” x 3 ⅛”.
Fabric B– purple
Cut:1 strip 1 ⅜” x WOF- cut into 8 rectangles 1 ⅜” x 3 ⅛” and 4 rectangles 1 ⅜” x 2 ¼”.
Fabric C– background
Cut: 1 strip 3 ¾” x WOF- cut into 1 square 3 ¾” x 3 ¾”- cut in half on the diagonal x 2 for 8 triangles; 4 squares 3 ⅜” x 3 ⅜”- cut in half on the diagonal x 1 fro 8 triangles; 4 squares 2 ⅛” x 2 ⅛”- cut in half on the diagonal x 1 for 8 triangles.
Backing and batting– cut 4 squares 5 ½” x 5 ½”.
Trim the block to 5 ½” square after piecing.