Hi friends!
This is our last post in the Lighthouse Steps Quilt Along!
And if you make it all the way to the end, I have a super giveaway for you!
Note: If you missed any of the quilt along posts, here are the links to the introduction, post 1, post 2, post 3 and post 4. There are also a lot of great comments in posts 3 and 4 with tips on piecing and achieving a great ¼” seam!
I hope you have been having fun following along and making your quilt top. Tell me, how did the top come out?
A little bit of true confession here- I sewed a few of my rows together in the wrong order! Yup. I really did.
After all my talk… make sure you look at your pictures so you sew the rows together in the right order…. I sewed them wrong.
So Jack (the ripper) and I had some quality time together! But the quilt top is fixed and all done!
In this final post, I am planning to talk a little about borders, quilting and binding.
Borders
The lap quilt does not have borders but the queen quilt does. However, if you wanted to make your lap a little bit larger, you could always add borders!
First I had to decide on the outer border fabric; I auditioned a few options but in the end chose this print.
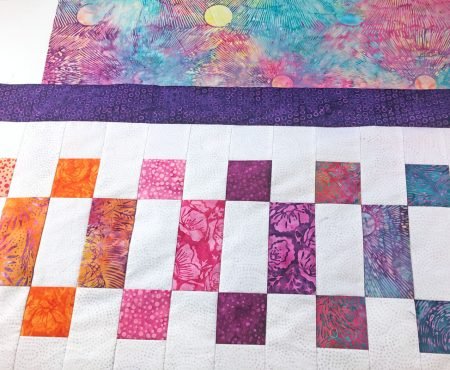
My one big tip for borders is to measure before you cut. In all my patterns, I teel you the size to cut your borders. That size is based on math; if all your seams are exactly the right size, your quilt top should end up this size so cut your borders to that size.
However in the real world, it does not always work that way! Maybe all your rows lined up because all your seams are exactly the same size but your top is not quite the size indicated in the pattern. that just means you were consistent with your seam size but not quite a ¼”. That happens.
The best way to measure your quilt top for the right border size is to lay your quilt out on a smooth surface. I usually lay mine out on the rug in the bedroom.

Then, for your side borders, measure through the center of the quilt from top to bottom – not along the sides! The side edges can be a little wavy or uneven.
I use a long acrylic ruler and pins to get an accurate measurement.
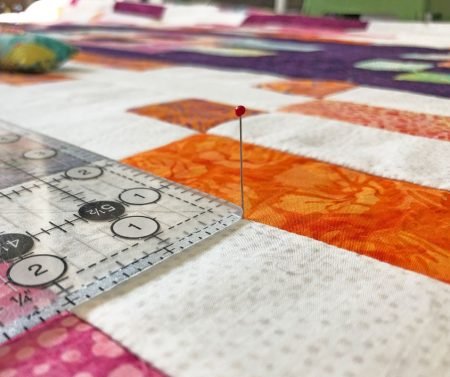
Then cut both side borders to that measurement. Pin the border to the quilt matching the center, the ends, and then in between along the entire border. As you sew, ease to fit as needed.

For the top and bottom borders, once the side borders are on and pressed, measure through the center of the quilt, this time from side to side. Cut your borders to that measurement.
Some people cut their borders longer than the sides, add to the sides and then just cut the excess off. It is hard to square up your quilt this way and you run the risk of a wavy quilt! For more tips, go to this blog post from the Exploring the Basics series.
Quilting your Quilt Along quilt
Are you planning to quilt the quilt yourself? I sent my quilt to my favorite longarm quilter, Crystal Zagnoli, who will do her magic and make my quilt beautiful!
There are so many ways you can quilt your quilt. I chose a wavy all over design for my lap quilt but you could plan to just do some straight line quilting to emphasize the strong lines in the design.

If you are bringing your quilt to a long arm quilter, be sure to check with them how big your back should be. The pattern assumes you need a back 4″ bigger than the quilt top on each side so overall it is 8″ bigger.
I actually made my back out of 3 different fabrics as I didn’t have enough of any one fabric. I like pieced backs. And I had a helper sewing the sections together.
Binding
Do you have a favorite size for your binding? Binding is typically 2 ¼” or 2 ½” wide. But some quilters like a skinny binding and cut theirs at 2″ and others like it even wider than 2 ½” .
I like 2 ¼” strips so that is what the pattern tells you to cut. You can always cut a different size!
Last year, as part of out Exploring the Basics blog series, Tammy and I had a post about binding and listed our top tips. If you want tips to bind your quilt, click here.
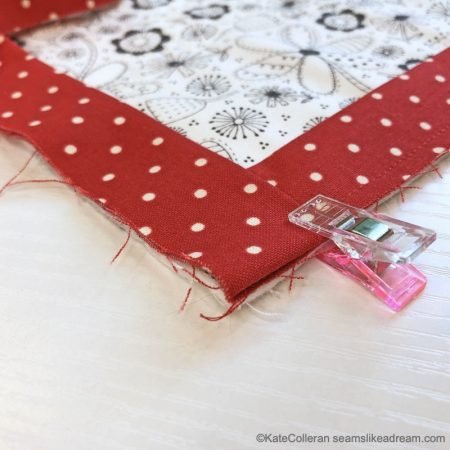
Or click here to go to my YouTube channel and watch my video on my 5 Tips for Better Binding. I had taped it as part of a Facebook Lives series and then edited it and put it up on YouTube.
Not only do you have to decide on a size for your binding, but you need to pick a fabric. Sometimes I want the binding to contrast and stand out; other times I want it to blend into the outer border.
I used one of the prints in the line for the border of my lap quilt. Actually it is the same print I used for the outer border of my queen quilt! Guess I really like that one!
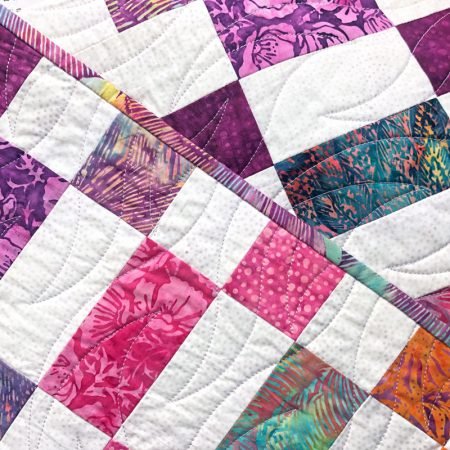
For my queen quilt, my plan is use the contrast fabric as the binding to provide a frame around the outside edges of the quilt. But I will will decide for sure once the quilt is back from the long arm quilter. I have been known to change my mind once I see it quilted!
And that’s a wrap! I hope you enjoyed making Lighthouse Steps and please feel free to share a picture of your quilt with me! I would love to see!
Last Quilt Along Giveaway!!
For our final giveaway, I have three awesome prizes for you!
Prize #1 is a queen size batting from The Warm Company. One of my favorite battings is called Warm 100- I just love the feel of the quilt once it is quilted.
Prizes # 2 and #3 are FQ bundles of the Painted Blossom batik line! I love this line and I think you will have fun with these fabrics.

To be entered for a chance to win one of these bundles, leave a comment on this post. You all have had such great tips for each other in the previous 2 posts- maybe tell us your favorite tip for borders or binding?
Giveaway is open to US residents and will close Monday April 12th at 9pm MT.

Thank you to everyone who has been following along! This has been so much fun!
happy quilting!
Kate
Upcoming Classes
Vermont Quilt Festival
The registration for the Vermont Quilt Festival is open! And the festival is virtual this year so you don’t have to be local, or hop on a plane, to attend!
The festival runs June 17-27th.
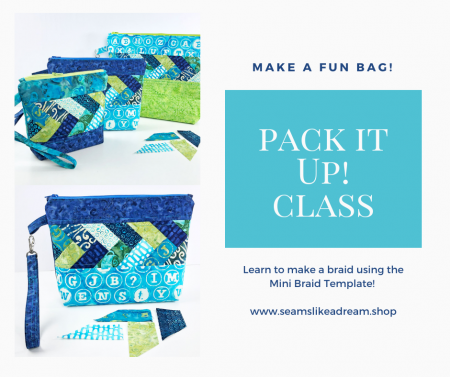
I am teaching 2 classes at the VQF- my popular Pack it Up! bag.
And my fun easy table runner, Table Scraps.
And I am presenting a lecture called How to Smash Your Stash!
Click here to go to the VQF website and check out the classes and registration.
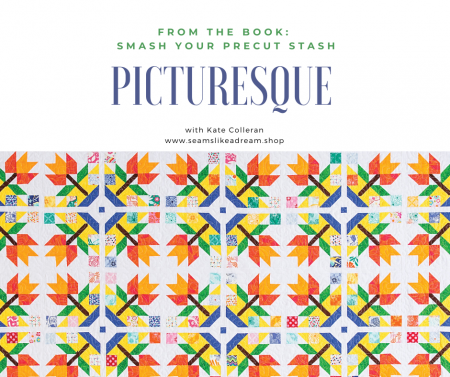
Picturesque
Let’s plant a garden!
I am teaching a virtual class through my quilt guild but you don’t have to be a member of the guild to participate! We will be making the quilt, Picturesque from my book, Smash Your Precut Stash.
Instead of one 6 hour class, we broke it up into 4 sessions of 1 ½ hours. That way you have time to pick fabrics, sew and not be stressed trying to keep up!
Click here to go the guild’s website and learn more. I would love to see you in class! Class starts April
I measure my quilt through the centers also, to get the border sizes to fit–seems to be the most accurate way.
Your quilt is just beautiful! I know what I want to do with all my batik fat quarters now! As for binding, I’m not sure that I have any tips, but when I’m not under a deadline for a gift quilt, I enjoy the process of hand-stitching the binding to back while watching something on Netflix. If I have to do machine sewing, I like using a flange binding. before I put on the binding, I square up the quilt with a large builder’s square ruler, and I zig zag the edges of the quilt sandwich. Thanks for this forum! I’m learning a lot. And thanks for the offering the great giveaways!
I love this quilt. I have a large bin with batik fabrics I have collecting for years. Everytime I go to a quilt shop, I buy 1/2 half yard and put in the bin box . I have been trying to figure out , the quilt I want to make.. Here it is. Thank you This will be my project for the spring and hand quilting during the summer.
My first quilt top in the books – whew – a few of my rows are out of order too even though I felt so organized. I’m not sure I’m going to rip them out – I’m just thrilled that I got this far 😍
My first quilt top in the books – whew – a few of my rows are out of order too even though I felt so organized. I’m not sure I’m going to rip them out – I’m just thrilled that I got this far 😍
I love this quilt. I have a large bin with batik fabrics I have collecting for years Everytime I go to a quilt shop I buy 1/2 half and put in the bin box . I have been trying to figure out the quilt I want to make.. Here it is. Thank you This will be my project for the spring and hand quilting during the summer.
Years ago one of my quilting teachers often used a six foot metal ruler which was purchased from a hardware store. This works wonderfully as fortunately, I have access to a four by eight raised table in my husband’s workshop.
Thanks for the giveaways. Love the batiks.
For my borders I take 3 measurements – each side and through the middle. I cut my borders the average of these. If the middle of my quilt happens to be a bit longer, I will ‘encourage’ the sides a bit to add some length. That way I may help avoid the dreaded volcano effect in the center. Thanks for all your great tips (and it’s nice to know that even the pros mess up and do some creative assembly).
I still have trouble with binding. I’ve watched so many videos on how to do it but can’t seem to get the hang of it.
I bind most of my quilts by machine. I really like to use the faux piping method. You get a great accent on the binding and you have a ditch to hide your stitches in.
So many good tips! I do have to say I machine bind all my quilts now. I’m not patient enough to hand bind them anymore.
I usually cut my strips 2 1/4 ” , machine attach it to the front , then turn it to the back and hand stitch. If it is a baby quilt I will attach it all by machine. I also love using striped fabrics for my bindings!
Beautiful fabric! And Warm & Natural is the only batting I use. I’ve not tried Warm 100 before. I don’t know what a flange binding is, so thanks for giving me something new to learn! Always use Wonder Clips to hold binding in place while you stitch!
My border tip is that pieced border shapes should reflect the size and shapes in your quilt.
Thanks so much for this series! I haven’t been sewing along but have it on my (ever-expanding) to-do list. I love your color choices and the way it feels like we’re almost having a conversation, as well as all the amazing tips I’ve picked up along the way!
I really don’t have any tips on borders/binding. I’m still learning myself. I don’t do very well yet on binding.
I just love your quilt. 💕
My favorite way to bind is on my machine. It’s quick, easy and it brings me so much satisfaction.
After sewing my binding strips together, I pin one of the ends to the middle edge of the quilt, leaving about 6″ of tail for adjusting. Then I lay the strip around the rest of the quilt edge, checking for seams at corners, all around the quilt until I get back to the beginning of the strip. I make any adjustments that need to be made, making sure that there is enough binding at the end for another tail. Sew binding down, leaving about 6″ unsewn at endings. Sew tails together with diagonal seam, fitting unsewn space. Finish sewing binding seam, turn binding, and sew to back.
I tend to use 2 1/2″ strips for binding. I apply it by machine. I do however, sometimes have a problem with mitering the corners.
I was lucky to find a 20.5 in. square ruler. It is so great to lay in a corner and square up my quilt.
Thanks for all the tips and instructions. I agree that measuring thru the “middle” of the quilt is the best way to keep a quilt squared. I like your color choices, batiks are always a win in my sewing room.. Kathy in NC Colo
I’ve enjoyed following along with you on this even though I didn’t tackle a project. Your tips are so good and it helps to have a gentle reminder why shortcuts don’t always work. Thank you.
I have really enjoyed reading about this quilt and love its fabrics! Thanks so much!
Lots of good information here! One thing I’ve started doing is attaching my binding with Wonder Clips before sewing. Then I can make adjustments if the seams end up at the corners.
i cut my borders lengthwise instead of crosswise, cuts down on waviness. i like a 2″ crosswise strip for my binding.
One tip for choosing a binding fabric is to lay out 3 or 4 fabrics around the edges of the quilt top to audition them. Stand back and get a good feel for each fabric and eliminate one or two. Sometimes taking a photo with your cell phone helps too. Seeing the photo really brings the best match forward!
duchick at gmail dot com
I like scrappy binding and I like to finish the binding by hand. I actually really enjoy the hand stitching!!
All the tips have been wonderful. Thank you. I love to sew my binding by hand unless it is a baby quilt. I know those get more washings and handled more.
I like to lay my binding strips loosely around the quilt before I sew it down to make sure I don’t have any of the joined pieces ending up in the corners.
I love the colors in this quilt. My favorite binding is the flange binding. It looks really elegant. The frame it creates is beautiful. Thanks for this series. Looking forward to the next.
I have found a new love for flange binding. Cut your binding strips 1 1\2 inches and your flange binding 1 3\4 inches. Sew the long sides together and press to the flange. Fold wrong sides together, press and apply like regular binding, only sewing from the back with the flange fabric up. When folded to the front, the flange will only show as an accent. I machine sew on the flange, and use invisible thread in the bobbin. Great way to use fabric that you don’t have enough of, and highlights the binding.
I prefer to finish my binding by machine. I like to use 2 1/2″ borders and then use a smaller binding around the outer edges.
The batiks look lovely!
I am now putting a binding on a quilted table runner I made. For the first time, ever, I’m putting the back of the binding on … by HAND! I’m not doing the usual slip stitch that I’ve always done, but am using Big Stitch running stitches. I’ve reacquainted myself, recently, with hand stitched embroidery – something I loved as a young girl – something my much older sister taught me. I now try to add embroidery to all my quilts be it Big Stitch outlining, or embroidered motifs. Pure pleasure.
I usually do a 2 1/4 inch binding but it depends on the quilt – I have added pipping to binding for an extra level of complexity (and a few well chosen words at times!) I make extra biding and have it ready for binding small quilts.
I vary the width of my binding depending on 1. the thickness of the quilt sandwich, 2. am I going to hand or machine stitch the folded edge of the binding and 3. end purpose of the quilt ( charity quilt, wall hanging, bed quilt, etc.). I like a full-filled binding, if that makes sense to you.
What a beautiful quilt! I hope to participate in your next quilt-a-long.
Love the quilt colors. Such a beautiful pattern and fabric.
What a great project, wish I’d seen it earlier. Have fun all who are doing it.
Who could not just fall in love with those batiks?
I’ve used warm Company batting before but not that one.
I get my best reults on binding with a 2 -1/4″ strip.
Thanks
Such pretty fabrics! I generally finish the quilt’s binding by hand. But when making a baby quilt that I hope will be washed a million times and well-used until it is used up, I am likely to complete the binding by machine.
Many thanks for the chance at your generous give-away! When I bind any quilt that has the potential to be heavily used, after I zig zag the edges of the quilt, I completely machine sew the binding. First of all, I heavily starch the binding fabric, then cut it into bias 2 1/2” wide strips. I join the strips, fold the binding in half, and press. I sew the binding to the back side of the quilt, stretching it slightly as I sew a seam allowance of about 5/16th” wide (It happens to be the width of my basic presser foot) . After the binding is sewn on one side, and the edges joined, I turn it to the right side of the quilt and zig zag the edge, hiding the original seam allowance.
This fabric is georgeous! Fat quarters are my favorite precuts!
I like doing binding by hand but if the project has a deadline and I need to finish fast, I will do binding by machine. I find corners are the challenge. The miter sometimes becomes skewed as I turn the corner. To avoid wonky miters, I will hand stitch just the corners to secure them and then go around the quilt, securing the binding with a serpentine stitch or ditch stitching next to the binding to hide the stitches. I have tried washable school glue but I don’t always launder quilts immediately so securing just the corners and finishing with machine is the best of both methods.
I guess I do overkill on measuring the binding. Instead of one measurement through center, I do 3. Top, center, bottom and then add them up, divide by 3 to get the average and that is how long I make my top or side borders.
Being a newer quilter, I don’t feel like I have too many tips or tricks to share that experienced quilters will benefit from. However I did discover that you can use the back side of a butter knife in place of a hera marker. I wasn’t sure if I wanted to invest in a hera marker, so I tried this method. And it worked quite well. I was proud of myself for thinking of it, although I guess it is more commonly known in the quilting world.
Awesome series- looking forward to next one!
Thanks for sharing!!