Hi friends!
It’s week 3 of the Creative Spaces Blog Hop and I hope you got some great ideas for new tools from all of last week’s posts. I know I have a few new things on my shopping list!
As I looked thru all the posts and comments about everyone’s favorite tools, I realized I had some of the tools but I did not know where they were! Hmmm. Maybe I am not as organized as I thought.
Actually, I know I am not as organized as I would like. I keep going back to what my dad said (and probably many of you had dads or moms who said this!): a place for everything and everything in it’s place. For me, what happens is that things pile up and sometimes I just put them away in the closest available space. Then they become out of sight, out of mind.
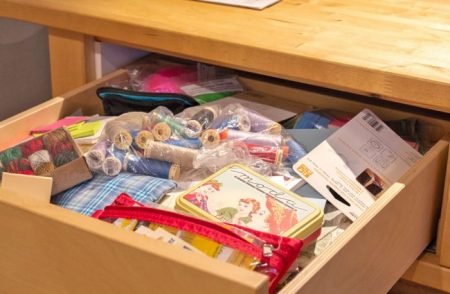
One of those spaces is this “junk” drawer in my cutting table. It started out with an organizer inside but the drawer is so deep, it was so easy to just pile stuff on top. And then more stuff. And then more. Now I can barely close it! There is probably a missing tool or 2 lurking in the depths of this drawer. As well as the organizer!
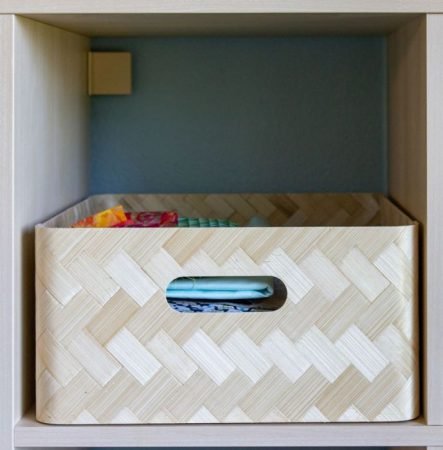
In other spots in my studio I am fairly organized. I have bins for scraps of specific sizes and bins for fabric by color. I like to store in bins due to how dusty things get out here. It is so dry that dust reappears about 3 seconds after you wipe it away.

And I have bins and baskets for projects. I try to keep all the fabric and pattern for a project together. Baskets are also fun and look nice, but again, things can get pretty dusty in there. One basket I have is only for bindings, labels and hanging sleeves.
Once I am done with a quilt top, I try to get the binding made right away before I move onto the next thing. I store it in the binding basket so it is ready to go when the quilt comes back from the quilter. I can just attach it and voila! The quilt is done.
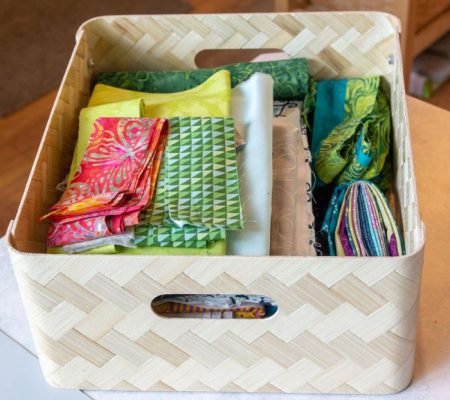
Sometimes I just throw the binding fabric in the basket which means I still have to make it when the quilt comes back. But at least I know where it is!
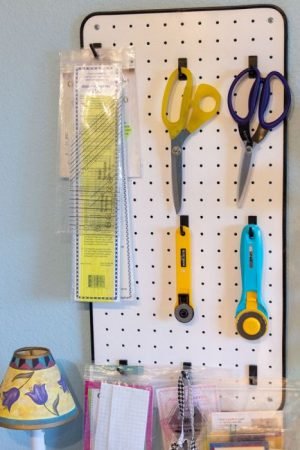
I have this small peg board hanging right near my cutting table that holds my rotary cutters, scissors, braid templates and other tools.
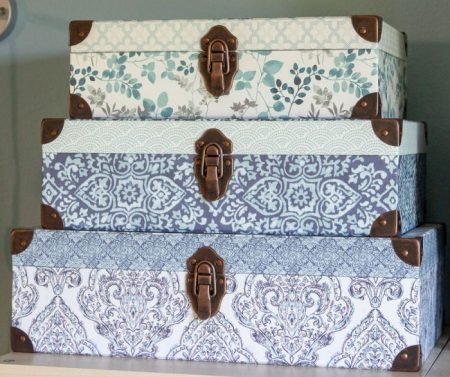
I have these cute storage boxes and the top one holds all my other scissors and cutters that I don’t use all the time.
I store the rulers that I use the most on hooks right by my cutting table so they are easy to grab. And, hopefully, easy to put away!
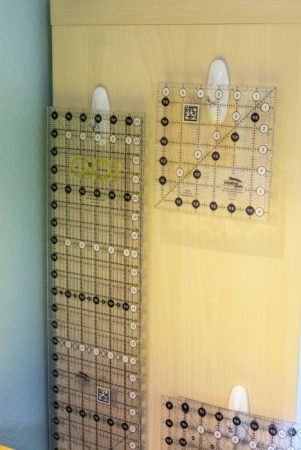
The rest are stored in 2 different boxes- one under the cutting table and in one of the cute ones on top of the bookcase.
How do you store all your rulers and templates? What are your best organizing tips? I would love to hear what you do- leave me comment so we can all share your best tips!
My best tip: create a place for everything so it has a home and try to put it back when you are done! (Thanks dad!)
happy quilting!
Kate
 p.s. I am teaching in September at AQS Quiltweek in Paducah! I am teaching my Pack it Up! bag and my Martini Bag. I hope to see you in class. Click here to check out my classes and my lecture.
p.p.s. The Daylight Company has created a coupon code for all of you following the blog hop. So if you always wanted to get one of their amazing lights for your creative space, click here to go to their website and use the code Swanhop18 and you can get 20% off your entire order thru the end of August!
How cool is that? Click here to go to their website.
If you need the list of all the bloggers in this hop, click here to go to my first post where they are all listed.
I keep my rulers on the wall too, and I’m kind of obsessed with putting them back in the right place!
I organize my rulers on hooks with my machine hoops. I am only storing the bigger ones, so I end up with small ones lost all over
I like the peg board idea. I also use plastic boxes for my projects and scraps.
Nicole,
The peg board is great. Wish I had room for a bigger one!
Sometimes drawers just become junk drawers…have you considered a layered system where you can lift out the top organizer to see the bottom better – an idea. I love that you usually make and store your binding as soon as the quilt top is done; I’m going to try and do that. The rulers that I use the most are stored in table top ruler organizers where they stand at the ready. All my other specialty rulers/templates are stored (along with their instructions) in a large Ziploc bag. Each bag is marked, the bags alphabetized, and then stored upright in a box. This has been perfect for me as I would often buy one of those rulers and then totally forget I had it or where I had it!
LJ,
The drawer stresses me out. Did you read Kris Poor’s post about her drawer? She has great tips on cleaning it out- I may have to do that. And I like your suggestion of a layered organizer. Outside of a quilt shop or book store, I love office and art supplies! Hmmm… I may have to go shop for that. What a pity. Ha!
I got a scrapbooking basket to store frequently used items in, sits next to sewing machine…. handy to grab and go to retreats or classes.
Cindy,
Well that is a good idea! Storage and travel ready all in one!
I haven’t figured out a good way yet but I have a huge peg board. Covers a whole wall and I love it.
Christi,
I bet! A huge peg board is so handy!
I have a tool box that belonged to my father and I keep my scissors, rotary cutters and specialty rulers in it. The rulers I use most are in a ruler rack on my cutting table.
Cecilia, I love that you have a tool box of your dad’s. Makes it special. thanks for sharing!
I have a slotted piece of wood for storing my rulers but, wouldn’t you know it, I’m out of space in it so they seem to get piled up beside it on the shelf. At least I know the general vicinity they reside. Your dad was right! It makes a difference!
Linda, Knowing where they live is the important part. Though sometimes my “piles” of things can get a little wobbly and cause an issue!
i have no committed storage for my rulers. They are hiding everywhere. Behind furniture, in drawers and I actually have a tray with slots especially for holding the rulers… I must get to organizing because I spend way so much time looking for things and end up buying more rulers because I misplace them. :/
Anita, I get it! I debated tray with slots but don’t have a spot to keep the tray. I too can spend way too much time searching for things I did not put away.
My templates are in a file organizer I bought at Staples. It keeps them organized (sort of). My rulers are on the floor under my cutting table, standing up and leaning against a set of drawers I have under the table. That doesn’t sound particularly organized but I know exactly where they are and can reach for and find any ruler immediately.
Allison, Having a place that works and where you can find them is the key, right? It is when we have no place, that they get lost and we spend more time searching than quilting!
I have hooks for my rulers and two towel bars in my studio to hang them from!
Ali, That is a great idea!
I have a whole wall with a peg board. Perfect for rulers. The leftovers are in a snap box. That peg board is the best thing I ever did.
Christi, I love my small pegboard. I agree; it is great! I have limited wall space so a bigger one is not an option but I love what I have!