Welcome to our series exploring the basics of quilting! Last time, we discussed how to do a fusible appliqué. Next time, we’ll be looking at the stitch and flip quilt technique. To see all the posts in this series, click here.
Hi friends!
Today in the Exploring the Basics series, Tammy and I are going to discuss the Disappearing 4 Patch block. I am going to show you 2 different methods that end up with 2 different looking blocks.
For each of these methods, I started with 5″ squares. I thought that was a great size as you can use charm squares!
Disappearing 4 Patch Block – Method 1
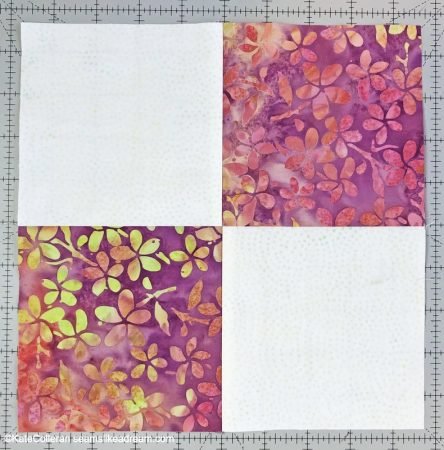
Step 1: Make a 4 Patch Block
Similar to the Disappearing Nine Patch block, this block starts with a basic block. This time it is a 4 patch. Easy peasy.
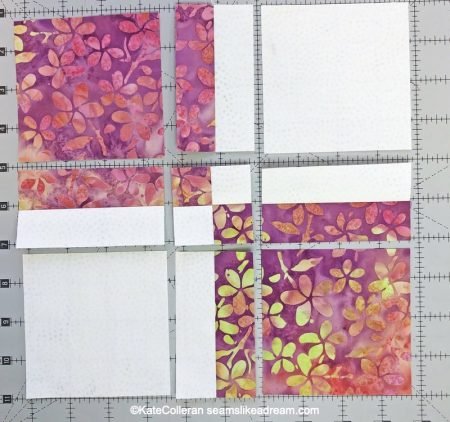
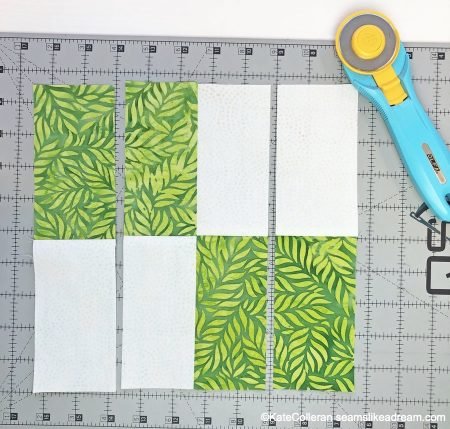
Step 2: Then you cut it up!
Start by cutting the block, 1″ from the center seam on 2 sides.

Then cut the other 2 sides.
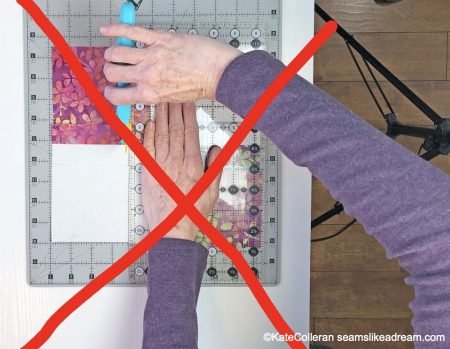
Using a rotating cutting mat, or just rotating your mat, will be very helpful here so you don’t have to do cutting gymnastics!
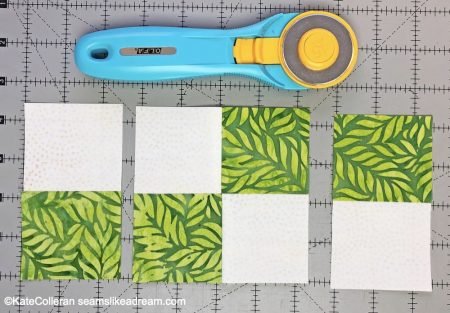
Step 3: Move the pieces around
Now the first step is to rotate the center block one turn.

Then swap the corner squares. The long skinny pieces don’t move!

Step 4: Sew it back together
Now sew the block together.
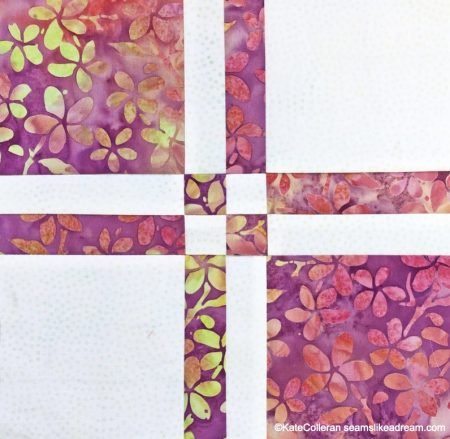
Tada! The blocks should measure 8 ½” x 8½”.
Disappearing 4 Patch Block – Method 2
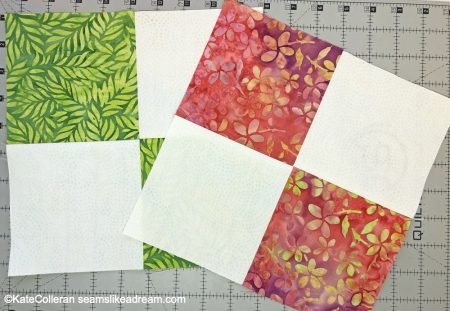
Step 1: Make 2 four patch blocks.
For this method, start with 2 different 4 patch blocks. My blocks happen to have the same light fabric but they don’t have to; you can use different backgrounds for each.
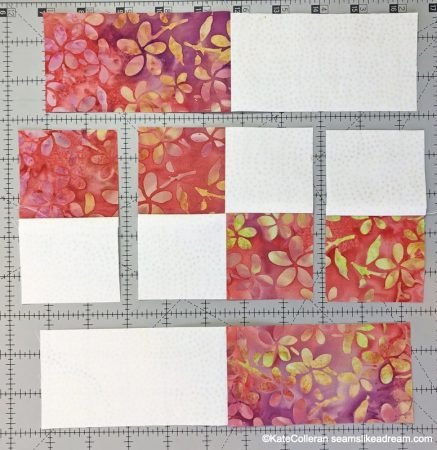
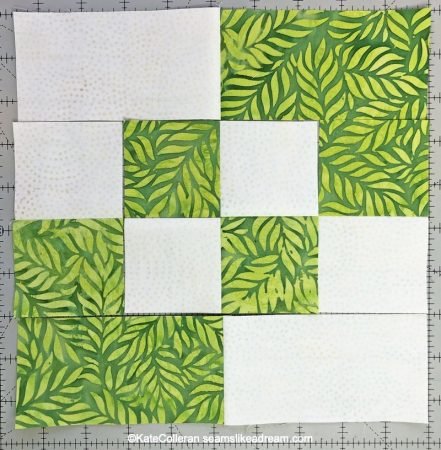
Step 2: Cut them up!
To cut these 2 blocks, start by cutting a strip 2 ½” wide from each side and set the rectangles aside.
Take the center unit and cut a 2 ½” wide strip from each side.
Do this for both blocks!
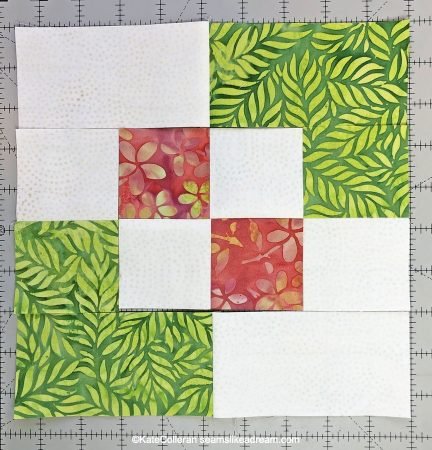
Step 3: Mix and Match
Now you get to decide if you want to mix up the units with all the same fabric in a block or mix and match the blocks.
If you use one color, they will look like this:
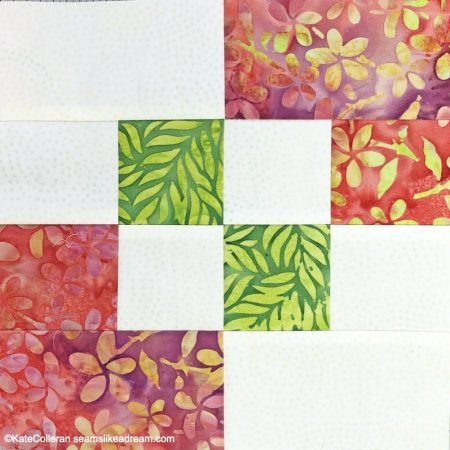
If you mix the colors, they will look like this:
Which I think is more fun so that is how I made mine.
Step 4: Sew the rows together.
Start by sewing the pieces in the center row together.
Next you will add the top and bottom rows.

You will notice that they are longer than the center row. Match up the centers of the rows and then once the block is sewn, trim the top and bottom rows.
The blocks should measure 8 ½” x 8½”.
I hope you have fun making your own disappearing four patch blocks! Click here to see see what great tips Tammy has for you!

Like this tutorial to make the Disappearing 4 Patch Block? Pin It!
happy quilting!
Kate
I absolutely love this tutorial! The disappearing 4 patch block is such a fun technique, and your step-by-step instructions make it easy to follow. I can’t wait to try it out in my next quilt project. Thank you for sharing your creativity and enthusiasm!
I absolutely loved this tutorial! The disappearing 4 patch block is such a fun and versatile design. Your step-by-step instructions were so clear, making it easy to follow along. I can’t wait to try it out with some of my favorite fabric scraps! Thank you for sharing your creativity!
You’re welcome!
I could not get to the free quilt pattern using these blocks. I would like to know how much fabric to buy for an entire quilt not just one block.
Hi Judy,
Thanks for asking. There is no quilt pattern; the blog post and the block instructions are just about different ways to make the disappearing 4 patch block.
I am disappointed that you do not include pressing instructions in your patterns.
Shirley,
Thanks for reading the blog and leaving a comment. Pressing is so important, isn’t it? I actually do include pressing arrows and instructions in the majority of my patterns. I didn’t here because, for this tutorial, I was focused on the different ways one can cut to make a disappearing 4 patch block.
And pressing preferences are so individual; some people like to press all their seams open while I tend to press my seams to one side and whenever possible, I love to swirl the seams to press!
Thanks for your feedback!
Ooh! Swirl! Good idea!
I would like to try these patterns
I hope to try it
I’m wondering how much yardage I would need to make a queen size quilt, using the disappearing for patch method using two fabrics one plain one print
Sharon,
I think it depends on how big you want your queen quilt and if you plan to add borders. A good way to start figuring out the math for a quilt is to know what you need for each block. Method 2 yields 2 blocks 8 1/2″ and uses 4 squares 5″ of background and 2 squares 5″ of each of the 2 fabrics. You can get 8 squares from a 5″ x WOF strip. So for 4 blocks you need 1 strip 5″ of each print and 2 strips 5″ x WOF of the background fabric.
Good luck planning your quilt!
Your instructions were great enjoyed watching it please put more. I teach quilting and piercing. Thank u for sharing
Thanks!
Thank you for the quilting inspiration!
Hi Kate,
I used 4 1/2” blocks for my 4 patches, then I cut them 2” front the center and I ended up with a perfect 16 patch. I’m tickled with this method. I also really like your method #2. I’m using these blocks to surround a panel. I plan to use them also for a quick baby quilt.
Thanks for showing us the technique so clearly.
Fran,
I am so glad the post was helpful- I like the idea of using the blocks to surround a panel. Great idea! Can’t wait to see.
Thank you for the pattern, i would like to make it soon😍
have fun!
Thank you for sharing this with great instructions and illustrations.
Brenda,
You are so welcome!
Love this site!!
Thank you Phyllis! So glad you are here!
Love to try these.
They are fun!
Thanks!! Love the fabrics you used.
Thanks Kathleen! The fabrics are from my new signature line with Island Batik called Tiki Punch coming out soon. I am having so much fun with them!