Welcome to our series exploring quilting basics! We left off with a look at shaded nine patch quilt blocks. Next time, we’ll be exploring the disappearing 4 patch block. For an overview of the series, you can check out all of the posts here.
Hi Friends!
Today in the Exploring Quilting Basics series, Tammy and I are talking about appliqué!
Last week in our first post of the Quilter’s Alphabet, Tammy and I talked about different types of appliqué and explained what some different terms meant. We decided to follow up with a deeper dived into 2 aspects of appliqué- fusible and machine stitching. Both Tammy and I used fusible with a lot of our appliqué projects and we each also love machine stitching.
So in our posts this week, Tammy is doing a deep dive into machine appliqué and I will explore fusible appliqué with you!
Ready to dive in?
Fusible Applique Basics
1. The first thing to know about fusible appliqué is that you need to have your images reversed before you draw them onto your fusible. Why? Because the drawn image will end up on the wrong side of your fabric and then you will turn it over and fuse it to your base fabric.
So …. if the image looks the way you want it when on the back of the fabric, it will be reversed on the front!
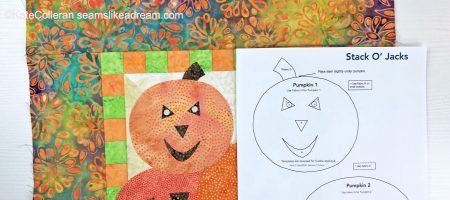
I recently updated my Stack O’Jacks pattern for teaching at the Fall Into Sewing online quilt retreat. My original shapes were not reversed and you had to do that yourself! So in my updated pattern, the images are reversed to make it easier.
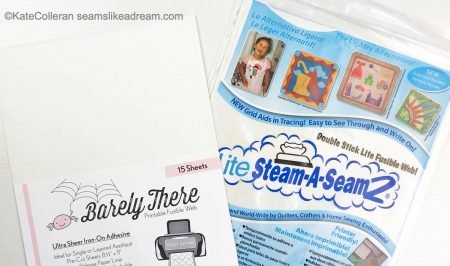
2. There are many fusible products on the market. Some are fusible web, some are glue based. Some products come without paper, such as MistyFuse, some come with paper on one side such as Soft Fuse or Barely There and some comes with paper on both sides such as Steam a Seam Lite 2!
It is very important to know the ins and outs of the fusible you are using.
3. Some fusible products are permanent and some need to have stitching around the edges or they may let go after washing. But, even if the fusible is permanent, you can still stitch around the appliqué if you like that look.
I love that look so I usually stitch around all my shapes. But knowing beforehand if you plan to stitch or not can help you decide what fusible you might want to use.
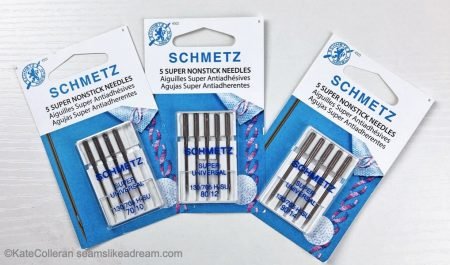
The biggest worry is usually the needle- will the fusible gum up the needle? Most newer fusibles are made to NOT gum up the needle but you can also use these needles by Schmetz- the Super NonStick needles are perfect to eliminate the stickiness!
For more on stitching around your appliqué, be sure to check out Tammy’s post!
Let’s chat more in depth on creating your shapes using the fusible.
Drawing the Shapes
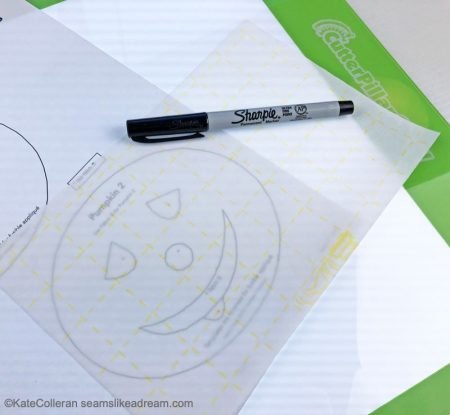
Again, first you need to establish if the shapes you are using are reversed for fusible or not. If not, what I usually so is put the image on my Lightbox. I turn the image over and lay my fusible on top. If I can’t see it clearly enough, then I remove the fusible and draw my image, following the lines, on wrong side of the page. I usually use a black fine Sharpie for this.
Then I put the fusible back and draw on the paper side of the fusible with my Sharpie.
You can group objects that will be cut out of the same fabric together.
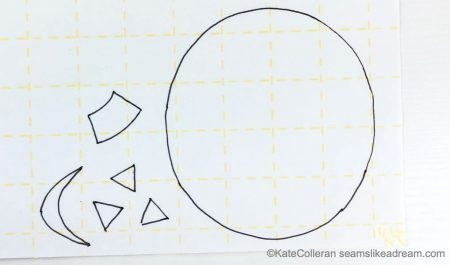
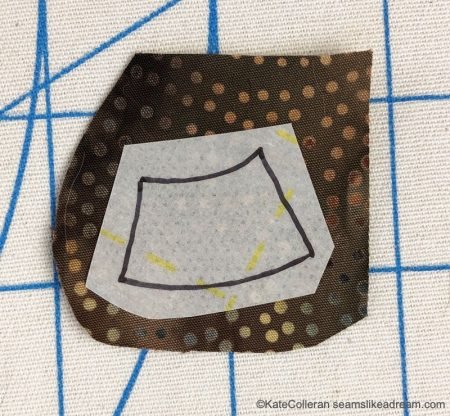
In my class on Stack O’ Jacks, I showed how I like to do what is sometimes called making a window pane. What is that?

Well, for large shapes, where other fusible appliqué shapes will be placed on top, I want to decrease the number of layers. So I will use the center of the shape as a spot to draw other smaller shapes. You will see below how I cut them out!
A Lightbox is such a help for these kind of projects. It’s also one of my favorite things to use with paper piecing.
Some fusible products can be run through your copier or printer; no drawing required! Check the options and printer requirements for your fusible.
Cutting out the Shapes for your Fusible Appliqué
At this point, you want to cut out your shapes. Don’t cut on your draw line at this point. You will do that later after you fuse the drawing to your fabric. I like to roughly cut about ¼” away from the lines. Remember, you don’t have to be exact here.
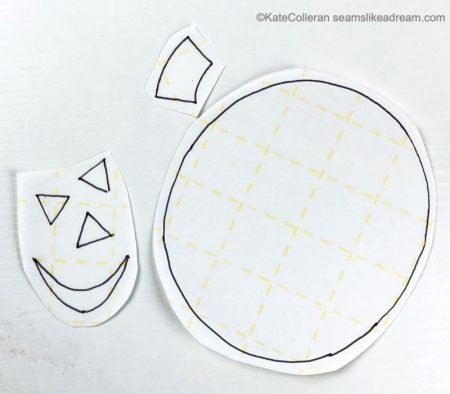
If I have a bunch of shapes that are going to be cut from the same fabric, I may just cut around them as a group at this point.
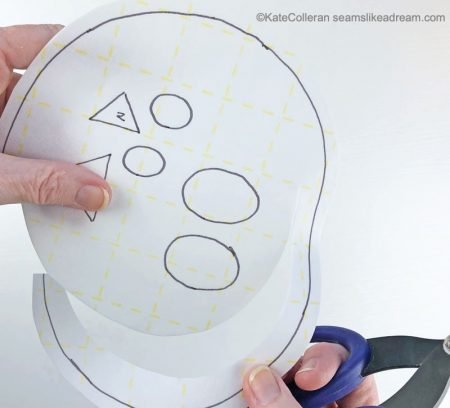
What about those shapes where I drew other shapes in the middle? You can fold the fusible and make a small hole with the tip of your scissors and then cut out the shapes. OR, an easier way is to make a small cut across the fusible into the center of the larger shape.
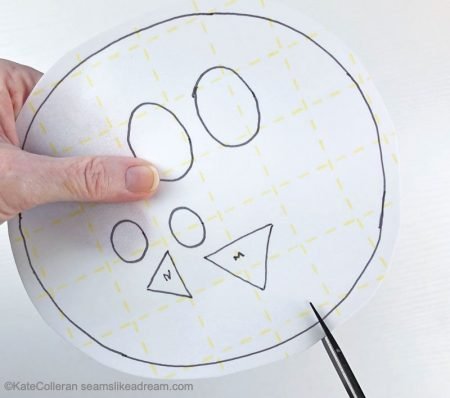
Cut a ring of fusible around the drawn line of the larger shape and cut out the inner shapes. I usually leave about ¼” of fusible on the inside of the line.
Once I have all my shapes ready to go, it’s time to fuse!
Fusing the Shapes to the Fabric
This is the most important thing to remember: EVERY FUSIBLE IS DIFFERENT. You must follow the manufacturer’s guidelines for your fusible. Some will work with high heat; for some high heat will destroy the glue and your fusible won’t stick. When quilter’s don’t have good results with their fusible, this is usually the reason. The iron temperature does not work for that product.
My suggestion? Create a few “throw away” shapes with leftover fusible and fabric and test the temperature of your iron. You may to tweak it until you find the right setting for your fabric, fusible and iron.
Some of the fusible products (like the Steam a Seam) with temporarily stick with just pressure. You don’t even need to use the iron yet.
Once your shapes are fused, and after they are cool, it is time to cut out your shapes. Cut right on the drawn lines. Remove the fusible.

Then place them on your background fabric and fuse again! Be sure to follow the manufacturer’s guidelines for your fusible.
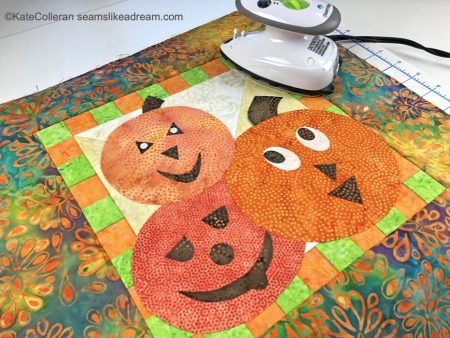
So pretty! Now onto machine stitching if desired.
Fusible Appliqué with Multiple Layers
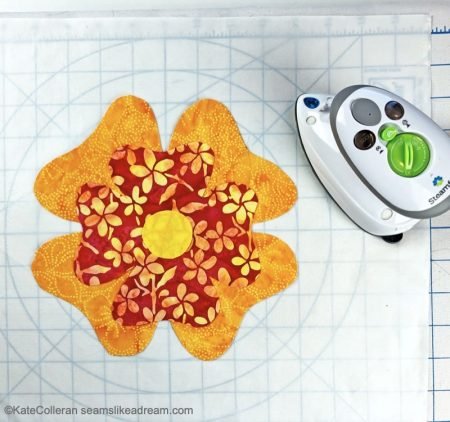
If your design has multiple layers, you might want to create the shapes and then fuse together the layers and maybe even do a little stitching before you fuse the larger shape onto your base fabric.
A really helpful tool for this method is an appliqué pressing sheet. With the paper removed, you can fuse the shapes together on top of the sheet and the fusible web will not stick to the sheet.
Note: always do a test first with your fusible!
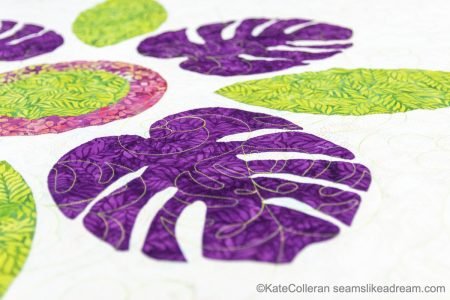
Depending on your shapes, you could stitch around the inner shapes before fusing the entire flower onto your base. I fused the three pieces of the flower from my quilt Tropical Sunset together before I fused the entire piece to the quilt. I also stitched down the center circle first.
Worked great!

I hope those steps were helpful for you the next time you decide to do a little fusible appliqué!
happy quilting!
Kate
Very helpful! Thank you!
Kathleen,
I am so glad you found the post helpful! Thanks for reading!
This is so helpful! Thank you. I am just learning about applique and the many choices of fusibles is confusing. Can you give us some advice about what products work best for you? Thanks!
Gloria,
There are so many choices out there! I will tell you what I use. While Misty Fuse is a favorite among art quilters due to it’s light nature- it really feels like there is nothing there- I like a product with the paper already attached. My favorite is SoftFuse by Shade Textiles. I seem to have success and get the iron the right temperature, it has a nice hand and doesn’t feel too bulky with multiple layers. But it is harder to find locally. I also like Barely There for the same reason as it is light BUT I often mess up and have my iron too hot for it and the pieces don’t stick. Wonder Under by Pellon is another product that has a soft hand to it. And it is usually available locally- though more at big box style stores.
Lite Steam a Seam 2 is probably the more versatile product and easier to find locally. It always sticks for me, I like that it is able to be moved around and repositioned; I can stick it in place with just some pressure and then play around until I have things where I want them. So for a beginner to fusible appliqué, that would be my recommendation. It can get a tad sticky when stitching through it so using the Schmetz non stick needles helps.
HeatnBond is also more locally available; it is a little heavier than the Wonder Under or SoftFuse.
One thing I will say- don’t mix products on the same project! I had a little of one product and a little of another, used both and made a mess! Some didn’t stick because the iron was at the wrong temperature. Oops! Rule of thumb, use less heat and no steam.
I hope that helps!