Disclosure: Some of the links below are affiliate links, meaning – at no additional cost to you – I will earn a commission if you click through and make a purchase.
Welcome to our series exploring the basics of quilting! Last time, we discussed some aspects of fabric die cutting. Next time, we’ll be looking at how to achieve the perfect 1/4″ seam. To see all the posts in this series, click here.
Hi friends!
Today in the Exploring the Basics series, Tammy and I are talking about pressing essentials- our tips for pressing quilt seams.
Why? Because pressing matters. A lot.
It is so easy to sew a perfect block and then press it out of shape!
Everyone has their favorite iron, or the iron they wish they could have to make their pressing easier. But really the secret is not the iron, it is the actions we take as we press our units, sections and our blocks.
Don’t get me wrong, a good iron helps! As do some other tools. BUT- how we press is essential! I am going to give you my 5 best tips for pressing quilt seams.
Tip #1 for Pressing Quilt Seams:
To steam or not to steam. Back in the post on fabric prep, I talked about if you don’t prewash, then you need to be careful with how much steam you use. Steam gets your fabric wet. If your fabric gets wet, it can stretch. And if it has not been prewashed, it can shrink.
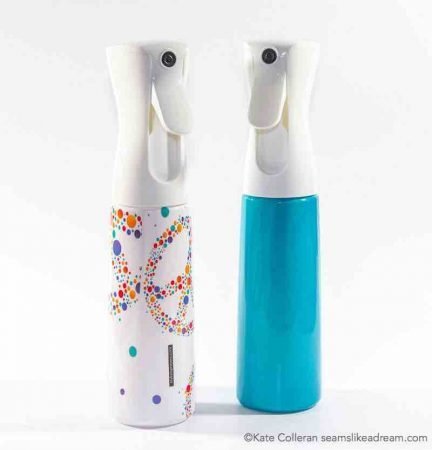
I don’t prewash and so I typically don’t use steam. I occasionally mist my fabric if there are super obnoxious creases that just won’t go away. But I am careful to mist, not soak, my fabric!
I love these bottles for misting.
I will say that steam can be a great help if your block piecing did not quite go as planned and you need a little help getting a block back in shape! Not that I ever have out of shape blocks…. haha!
Tip #2 for Pressing Quilt Seams:
Before you start cutting, when you first iron your fabric to get rid of all the folds from being on the bolt, iron with the grain, not on a diagonal. You will be less likely to iron your fabric out of shape.
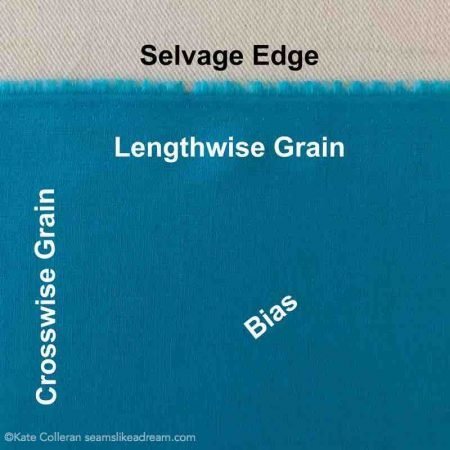
Some of you may be thinking- press, not iron! True, but it is harder to just press all the wrinkles out, so if you need to press, go with the grain!
Tip #3 for Pressing Quilt Seams:
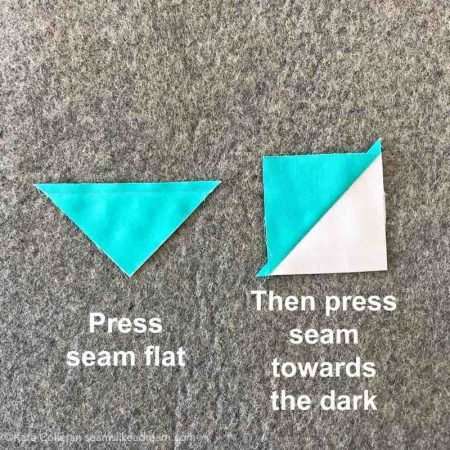
Once you make your units, first press the seam flat. It relaxes the stitches which makes it easier to then do the next step. Then I like to open the layers of fabric, and gently finger press the seam to one side and then take the iron and press it flat. Not as time efficient as using the tip of the iron to push the fabric to one side, but I am less likely to get a crease this way.
Plus, I like to press on the right side of the fabric whenever I can as this also helps prevent an extra crease.
Remember, let the iron do the work. Heat and pressure will help the seams lay flat.
And if you have one of the Olisio irons, there is less up and down when you follow this method!
Note: Usually a pattern will tell you how to press the units, the blocks, the rows and the quilt. Some people prefer to press seams to one side whenever possible; other prefer to press all their seams open. I am old school and I like to press my seams to one side when I can. I find I can match up my seams better when the seams are pressed to one side, going in opposite directions. But sometimes, pressing open is the best option! Do what works for you.
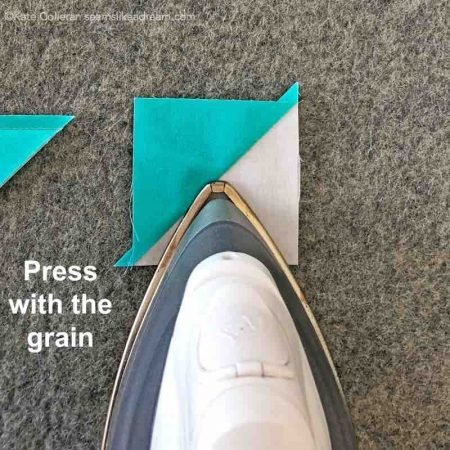
Tip #4 for Pressing Quilt Seams:
If you must run your iron across your patchwork, again, go with the grain. For example, if you are pressing a HST unit, it is tempting to press towards the angled seam.

Instead press along the straight of grain and you are less likely to end up with a parallelogram!
Tip #5 for Pressing Quilt Seams:
Press, not iron!
Oh wait! I already said that. But it is worth repeating because it is so important!
Here is another tip- when pressing seams open, a pressing bar like this one is super helpful.

And here are some of my favorite tools for pressing!
- Wool pressing mat. I love, love, love my wool pressing mat. Yes they are pricey but so worth it! It is wonderful when making braids and perfect for units like HSTs. The fabric just sinks into the wool and is less likely to be pressed out of shape.
- Pressing cloth for paper piecing. I like to use an old piece of muslin as a pressing cloth when I am paper piecing. Sometime the ink of the paper can get on my iron or on my ironing board, so the pressing cloth helps to eliminate that.
- Silicone sheet for fusible applique. Pressing using the silicone sheet helps keep the fusible off my iron and off the ironing board.


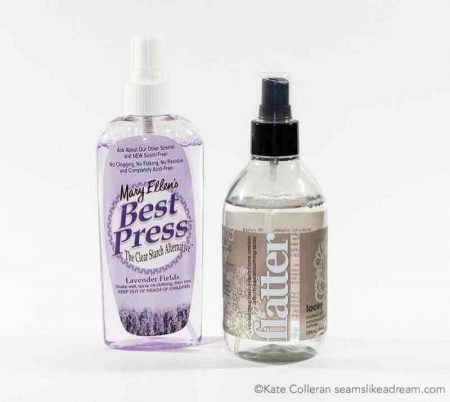
- Best Press and Flatter. I like them both. When I need the help to be a little more substantial, I use the Best Press. When I just need some light assistance, the Flatter is nice and it feels lighter on the fabric to me.

Iron Maintenance
Last but not least, what about iron maintenance? Do you ever clean your iron? There are commercial iron cleaning solutions out there. Cleaning your iron means that anything you got on it, won’t transfer to your fabric and get permanently adhered.
What is an easy fix if you do get fusible web on your iron? A used dryer sheet is perfect for removing stuck on fusible. Just run your warm iron over the dryer sheet and voila! It comes right off.
What about you? Do you have any great tips for pressing quilt seams? Please share your best tips in the comments!
happy quilting,
Kate
Click here to head over to Tammy’s post and get her great tips on pressing!
One comment