Welcome to our series exploring quilting basics! We left off with a look at how to achieve the perfect 1/4″ seam. Next time, we’ll be exploring flying geese. For an overview of the series, you can check out all of the posts here.
Hi friends!
How to Make Easy Half Square Triangle Units
Today in our Exploring the Basics series, Tammy and I are talking about easy ways to make half square triangle units, or HSTs.

I love HSTS units which is why I have done a few other blog posts in the past on them and showed some ways I like to make them.
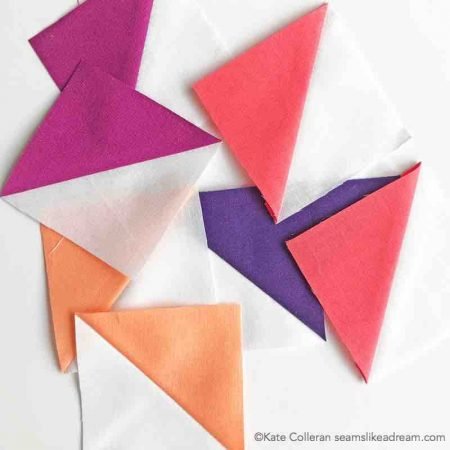
This post showed some reasons why I like HSTs, and this post showed one of my favorite tools. In today’s post, I am going to show you several different methods to make easy half square triangle units so you have options!
But first, the math!
Basic Half Square Triangle Math
To determine the size of squares you need to cut to make a half square units, start with the finished size you want your HST to be in the quilt. I will say mine is 3” finished.
To the finished size you add ⅞”. So I would cut my squares 3 ⅞”. This math will work for Methods One and Two below.
Now, if like me, you want a wiggle room when making your half square triangle units, you can round up the numbers. So instead of 3 ⅞”, I would cut a 4” square. You could even it cut it bigger for more wiggle room!
This means I would need to trim my units to size after sewing, but that just makes them super accurate! And later in the post I will share some great tools for trimming those units down.
Method One
In this method, you cut a square from 2 fabrics and then cut them in half on the diagonal for 2 half square triangles. Layer the 2 different triangles right sides together, sew the long side and then you will have a half square triangle unit.
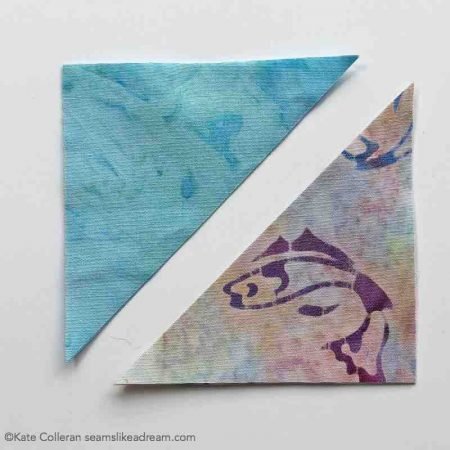
Many quilters feel this method is old fashioned and it can be hard to get those points to run smoothly through your sewing machine. I agree with the machine part. But it is a great method for using up scraps!
If you have an AccuQuilt Go! cutter, these half square triangle shapes have angled edges which lets them fit together better, limits the dog ears and makes it easier to sew!

Method Two
In this method, instead of cutting the triangles, draw a diagonal line corner to corner on the wrong side of your lightest square. Sew a ¼” away from the line on both sides and then cut along your diagonal line. Press to the dark triangle and you have 2 half square triangle units.
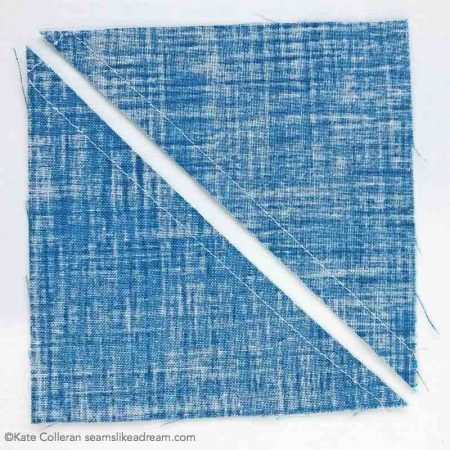
This is one of my favorite methods for HST units; I cut them oversized and am happy to trim them down so they are just perfect. I can cut straighter than I sew; I seem to wobble sew- even if I have a guide and all the fun tools available.
Method Three
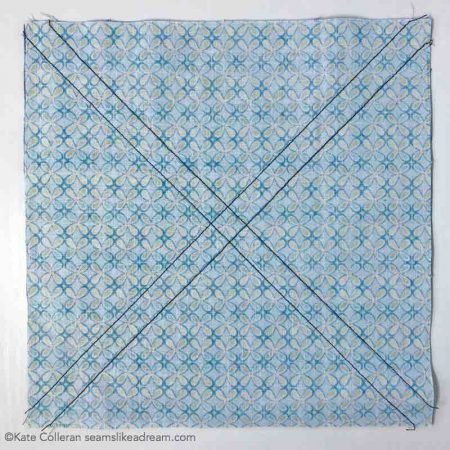
Method Three makes 4 half square triangles units at once. Start with your 2 squares layered right sides together but instead of sewing ¼” away from the diagonal line, sew a ¼” seam all around the outside.
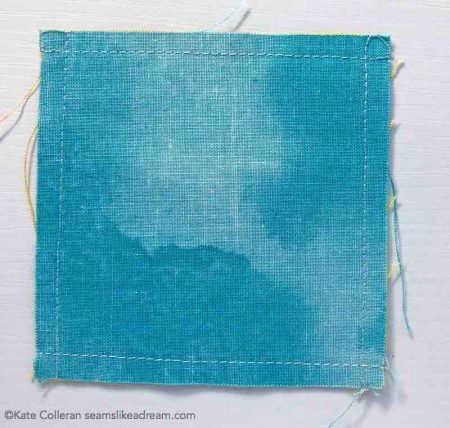
Cut along the diagonal twice and you will have 4 HST units.

The math for this method is a little weird. To figure out what size to cut the squares, take the size you want the finished HST units to be and divide by .064. So for a 3” finished square 3 ÷ 0.64 = 4.6875. I would cut the square at least 4 ¾” or 5” for a bit more wiggle room. Then you can trim to size after sewing.
NOTE: with this method, you will have bias edges on the outside of the HST units, so handle with care! These are very easy to stretch out of shape.
Method Four
In this method, you can make 8 half square triangle units at once with no bias on the outside edges! A nifty technique.
The math for this method is similar to the math for Method 2 where you make 2 at a time. You will add the same ⅞”- just twice! So, for any size, you will double the size of the finished square and add ⅞” twice (or 1 ¾” total).
To start, draw lines corner to corner along both diagonals and sew ¼” away from the line on both sides.
Cut thru the center of the squares in both directions. Then cut along both diagonal lines between the stitching and you will have 8 HST units.

Method Five
Paper. There are different paper options for making HST units but the 2 most common are Thangles and Triangles on a Roll. I like using Thangles if I have a few units to make and the other if I am making a large amount of the same HST unit.
I you like paper piecing, you will like this technique! The HST units are very accurate as you trim after sewing.
Marking your Easy Half Square Triangle Units
There are a lot of different tools you can use to use to mark your fabrics- here are my 2 favorites. I love using the Quilter’s Magic Wand along with a Sewline pencil. The Magic Wand is sized for a scant ¼” mark. I have Sewline pencils with white lead, black and pink so I can mark different color fabrics.
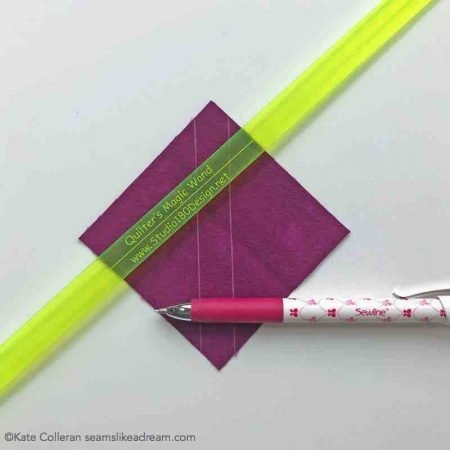
I like to make my marks with my fabric laying on a sandboard. That way the fabric doesn’t slide around. You can buy one or make one with some cardboard and then just glue a piece of sandpaper to the top. Easy and inexpensive!
If you don’t like making marks with a pencil, you can use a Hera marker to make a small crease in the fabric to use as a line.
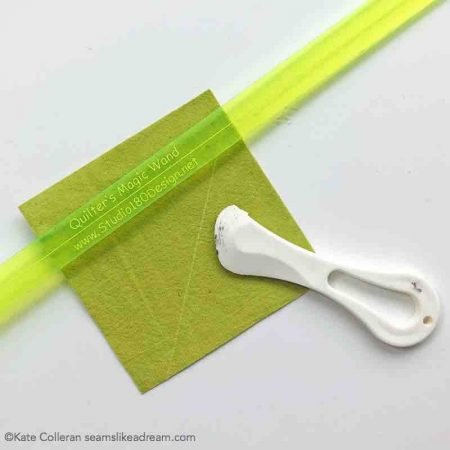
It almost looks like I used a pencil on the fabric doesn’t it? (And yes, my marker has gotten beat up. It had a mishap!)
Trimming your Easy Half Square Triangle Units
When I make my HST units oversized, I have to trim them down to the correct size. Which I don’t mind doing to ensure the units are accurate. You can trim before or after pressing. I like to trim once the units have been pressed.
Two rulers I like to use to trim- the Bloc Loc HST ruler and the Tucker Trimmer.
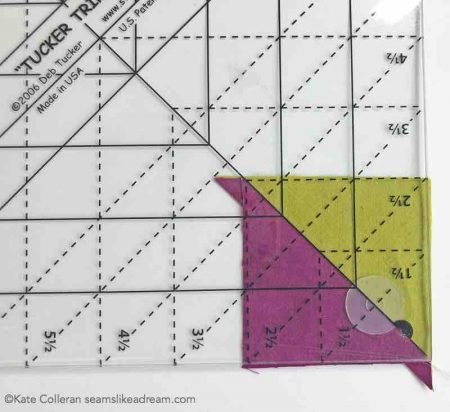
Which one I use depends on my mood! You can trim your HST units to size using a regular quilting ruler with a diagonal line but specialty rulers just make things easier.
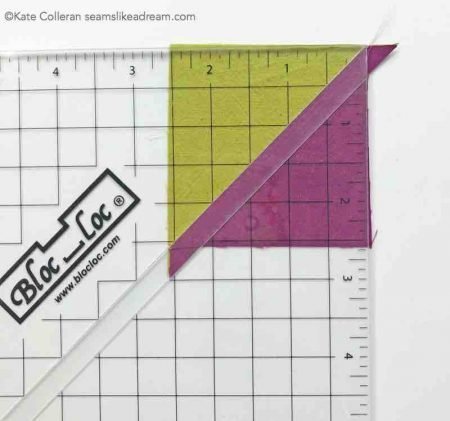
No matter which ruler you use to trim, keep the diagonal line of the ruler along the diagonal line of the unit so the seam ends up in the corner. That way, when you sew your unit into your block, you don’t cut off any points!
There are more methods for making, marking, and trimming half square triangle units. No one right method is the right method. Find one you like, or maybe a few you like!
I find I switch up which method I use depending on a few factors. It might be how many I have to make in any given size or fabric combination, my mood or what supplies I have on hand! Though my go-to method these days is Method Two.
Don’t forget to click here and head over to Tammy’s blog post to see her great HST unit tips and tricks!
Next week, the first block in the Adventure in Color Quilt Along will use some HST units. Now we are ready!
happy quilting!
Kate
3 comments