Hi friends!
How are you?
Sorry I did not post last week but I was teaching at the AQS Quilt Week quilt show in Lancaster PA. And even with all the snow, we were busy! I had such a great time. Exhausting but fun. The students in all my classes were so nice, even when we had issues with machines or other equipment. And I had a chance to chat with other quilt instructors and learn from them as well. And my roomie (Kathy Doughty of Material Obsession) was awesome!
So today we are going to chat for a bit about paper piecing. First question: do you love it or hate it? Or are those choices too extreme? How about-is it OK or not a favorite?
I don’t do a lot of paper piecing but I appreciate the technique because when you are making something that has those sharp little points, or funky shapes, it can be a lifesaver!
I find that if you know the process, it is really pretty easy. I even have a free download for a mini star pattern that you can use to practice on. Sound good?
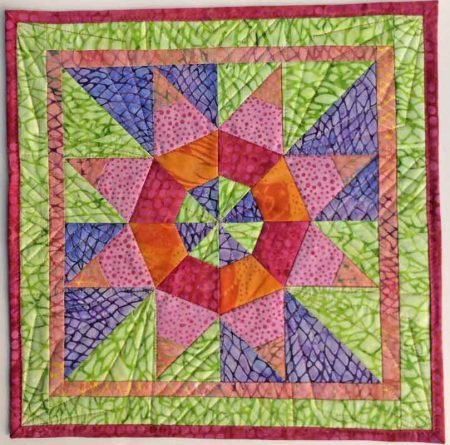
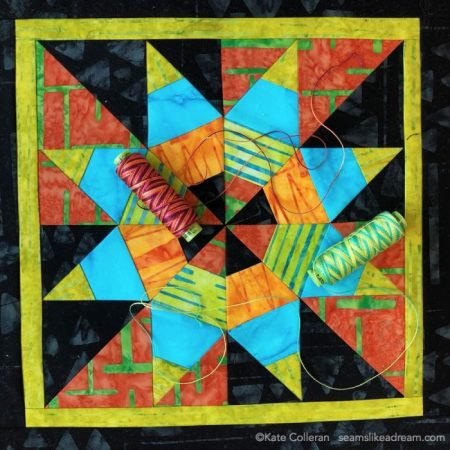
This is my original paper pieced star mini. Cute, huh?
Let’s walk thru the process. Or I should say, one process to paper piece. There are lots of ways to make this work.
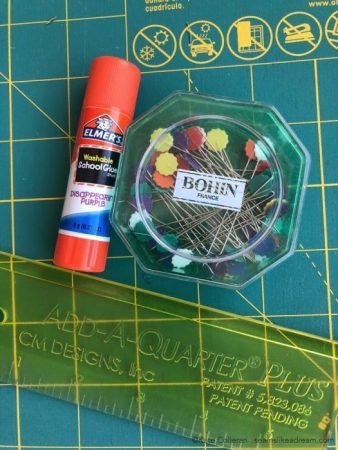
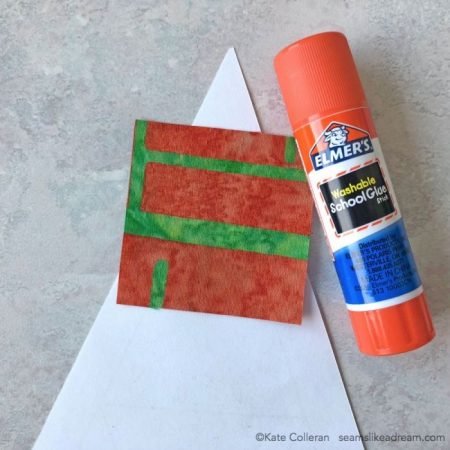
My favorite tools for paper piecing are three things: a washable glue stick, long flat head pins and the new Add-a -Quarter Plus ruler. This is what works for me.
To start, first you have to print you pattern on some paper. There is paper piecing paper which is very thin, like newsprint, that works well. But you can also use cheap copy paper. Just remember, this is like fusible appliqué- your final pattern will be the reverse of what you see on the paper.
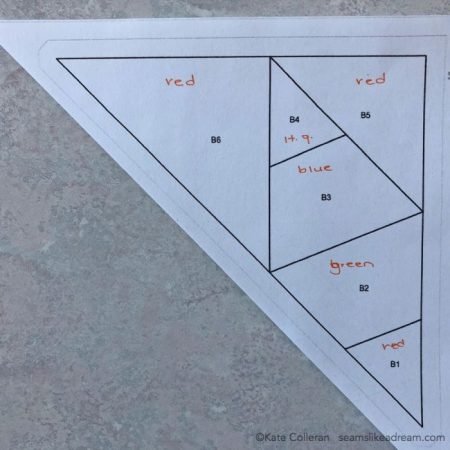
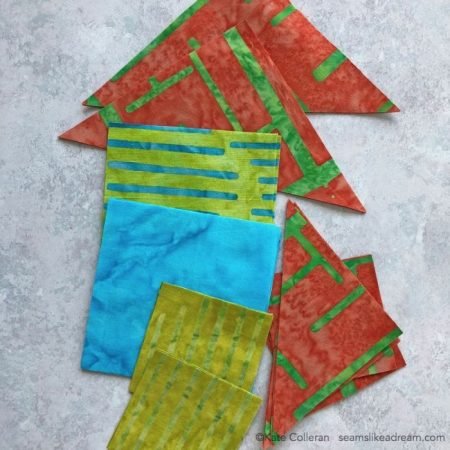
Next, plan where each fabric will go and then cut your fabric into pieces that are big enough to cover the section. At least ¼” bigger on all sides. Some people like to cut really big pieces, others like their pieces cut just big enough. I usually try to cut them oversized so I have some wiggle room.
(Just an FYI- the free star pattern lists piece sizes that are just big enough; if you want them oversize, cut a little bigger!)
Now start with piece #1. Lay the fabric on the WRONG side of the paper (the side without the lines) with the wrong side of the fabric touching the paper. Use a bit of the glue on the paper to hold it in place.
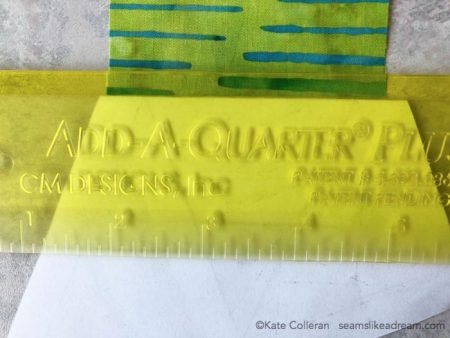
Fold the paper along the line between piece #1 and piece #2. This is where the Add-a-Quarter plus comes in- just use the tapered edge to help crease the paper.
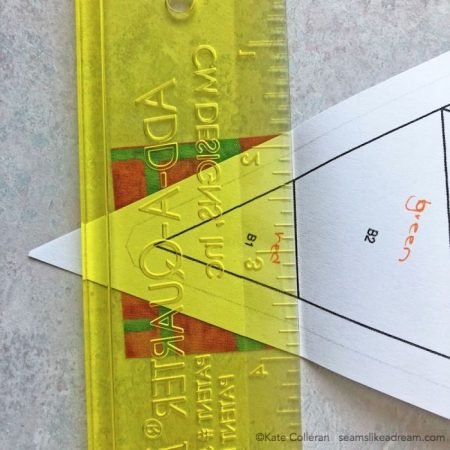
Lay the ruler along the seam line and then trim the ¼” seam allowance. The ruler has a lip that rests against the fold and makes it easy to trim.
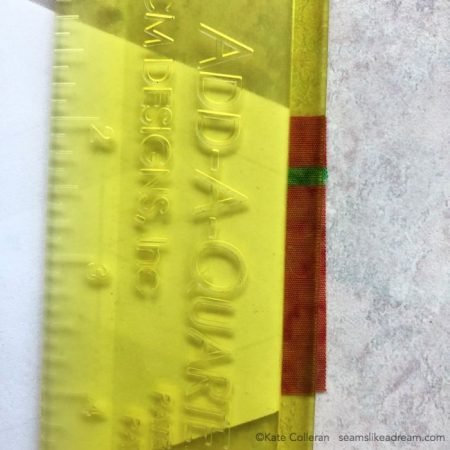
Turn the paper back over and lay piece #2 along the trimmed edge. You can use the long flat head pins to hold the 2 pieces together.

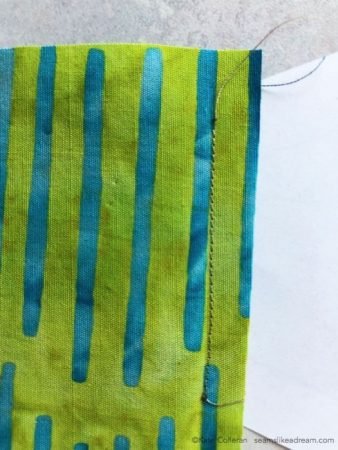
Turn the paper back over and stitch along the line between piece #1 and piece #2 with tiny stitches. This is what the stitches will look like on the other side. Press to piece #2.
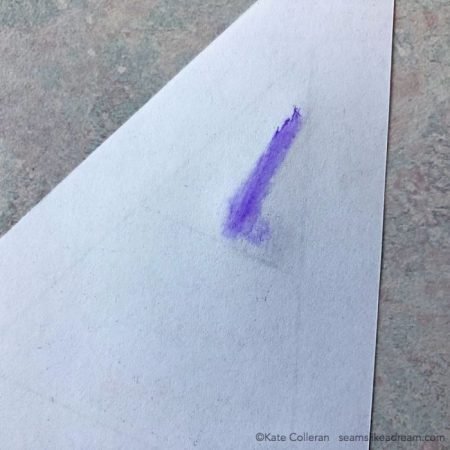
Repeat using the line between piece #2 and piece #3 and so on. Once all your pieces are added, trim along outer lines making sure NOT to trim away the seam allowance.


This is what might happen if your pieces are not cut big enough or if they shifted during sewing!

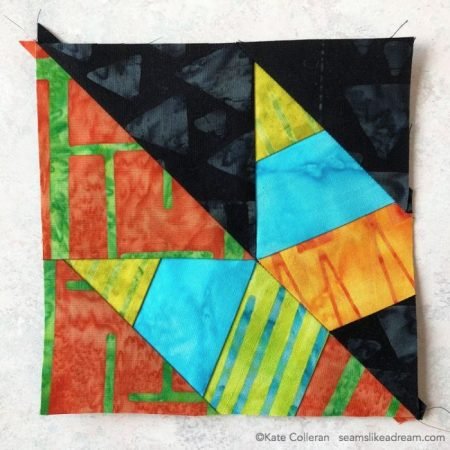
For this quilt, sew 2 units together into one section and then sew all 4 sections together.
So if you haven’t tried it yet, paper piecing is a great way to piece tiny points.
What color thread do you think I should use to quilt it? The variegated warm colors or blues and greens??

Here is a link to my free pattern.
Happy quilting!
Kate
Warm colored thread. I just think it would be great.
Hi Kate! Thank you for the free pattern. I am still working on Sweet Beets and whirlybird quilts from 2 of your Lancaster quilt classes! When the quilts are completed I will be using the blue batiks that I won in your class to paper piece this cute mini quilt.
I hope you will be by Yankee Quilter some time soon!
Pat
P.S. I like the blues and greens thread.
Love it! if I have been working on something ‘normal’ I have to have my paper piecing fix before going on to the next project. this is so interesting. thank you very much.
I love paper piecing when I am not in a hurry…otherwise, it takes way too long!! I really don’t like needing to frog my stitches when I am paper piecing, but I have learned how to do it quickly and without ruining the fabric or paper!! Lots of practice :o) I would use the blue-green thread for quilting…the dark thread will show up more on the light fabric then the lighter thread will on the dark fabric…unless that is the look you are going for!! I would probably use three different colors of thread if I was quilting this…red/orange, blue/green, dark blue.
Fun idea!
I love paper piecing because, for some reason, I am drawn to the patterns that designers make. I am working on a paper-pieced sampler quilt now. Last night, I made the “oops” where my pieces were not cut large enough for a triangle. This quilt will take me quite a while, but it will be something that I will love forever when it is done.
Good luck with the quilt!
I like the blue and green thread. Paper piecing is really great once you get the hang of it!
Yes it is!
Great post!!! I love paper piecing!!
Thanks!